
Bagpipe Staff Shares Holiday Family Recipes
Staff celebrates holidays with festive food
December 10, 2021
As the end of the semester approaches, it’s hard not to salivate at the thought of a warm holiday meal in this cold season.
In anticipation of the upcoming holiday season, the Bagpipe staff has released a cookbook filled with our favorite recipes that will fill your dinner table with mouth-watering flavor. We aim to help readers regale visitors from afar and appreciate the loved ones they see every day.
We know that the holidays are an opportunity for togetherness, so the recipes in this collection are both fun to make and shareable, which will create unforgettable moments for families to bond.
From breakfast fare to hearty dinner to dessert delight, this cookbook suits your needs for an entire day of festive cooking.
We hope you enjoy making our recipes and wish you all a happy holidays.
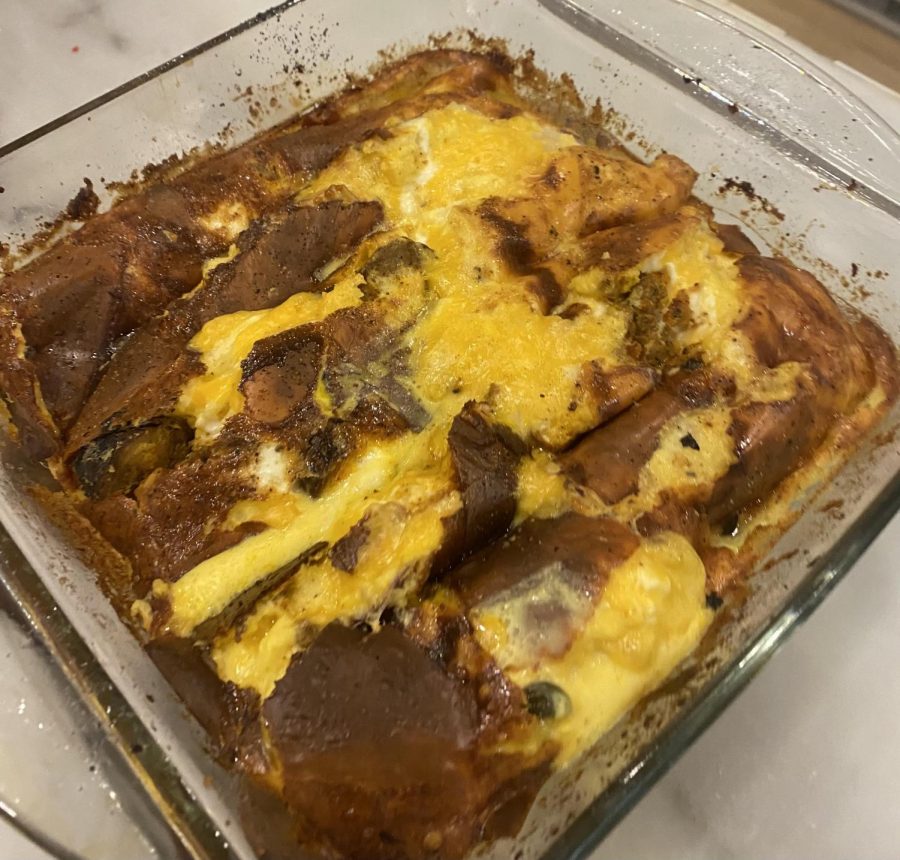
In this pan, eggs, sausage, potatoes, and lots of cheese are blended together. This casserole dish is made every Christmas morning in the Greenlee House.
Greenlee Family Breakfast Casserole
Perfect egg and cheese combination
Once the thrill of opening Christmas presents and running around the house with new gifts is over, the one thing you want is something filling that will keep you satisfied until Christmas dinner.
You need something savory, something customizable and something that makes your mouth water when you see and smell it.
My family has always been obsessed with breakfast. So of course we have a recipe we make every year on Christmas morning. A breakfast casserole.
My family got the idea from a pin from Pinterest. The recipe is called Cheesy Bacon Potato Breakfast Casserole from Simply Delicious.
The dish is simple. All you need to do is prepare the ingredients and then combine them in a sprayed pan. I use a spatula to whisk everything together. I personally like to put all of the liquid ingredients together and then the cheeses and spices. Additionally, I prefer to line the bowl with melted butter. I find that using butter makes the eggs fluffier. We also turn the oven on broil for about 5-10 minutes so that the top layer of cheese becomes crispy.
It is the perfect blend of fresh cheddar cheese, chopped sausage and shredded hash browns enclosed in scrambled eggs. The hash browns add a bit of chewiness and the sausage adds seasoning and spice to enhance the dish.
The eggs combined with the milk and whipping cream allows the eggs to be fluffy, light, and silky. If you add the seasoning in, the dish is complete.
This dish is also unique as the ingredients can easily be changed out. For instance, in the photo, I was craving sausage and my family had bought a large amount of meat the night before. The hash browns can also be swapped for brioche bread.
Also, the more cheese used, the better. My parents like to buy a blend of different cheeses like Asiago, Parmesan and mozzarella. We always add more cheese than the recipe calls for. It’s significantly better when you lift a piece from the pan and bits of cheese are oozing out of it. That’s why I think this dish is a fan favorite because it’s so easy to make and so easy to customize.
This dish can also last for days if divided correctly. My mom likes to make a giant casserole on Christmas so we can eat a fraction of it that day and then bag the rest and place it in the fridge for later.
When my family and I make this, we make it the night before, leave it in the fridge overnight and then put it in the oven first thing in the morning so that it’s ready to be devoured when we’re done opening presents.
Ingredients
3 large potatoes peeled and cubed
1-2 tbsp olive oil
2 tsp salt
2 streaky bacon chopped
1 onion finely chopped
2 garlic cloves crushed
2 cups grated cheddar cheese
5 eggs
½ cup milk
¾ cup heavy/whipping cream
2 tsp salt
1 tsp pepper
Instructions
Pre-heat the oven to 180ºC.
Toss the potatoes with olive oil and salt and transfer to a baking sheet. Allow to bake until crisp and golden (approximately 30 minutes) then remove from the oven.
In the meantime, fry the onion and bacon until the bacon is crisp. Add the garlic and cook for another 20 seconds then remove from the heat.
Place the potatoes, bacon and onion mixture and half of the cheese into a casserole dish.
Whisk the eggs, milk, cream and seasoning together and pour over the potatoes and bacon. Top with the remaining cheese and place in the oven.
Allow to bake for 30-40 minutes until golden brown and cooked through. Remove from the oven, allow to rest for 5-10 minutes then slice and serve.
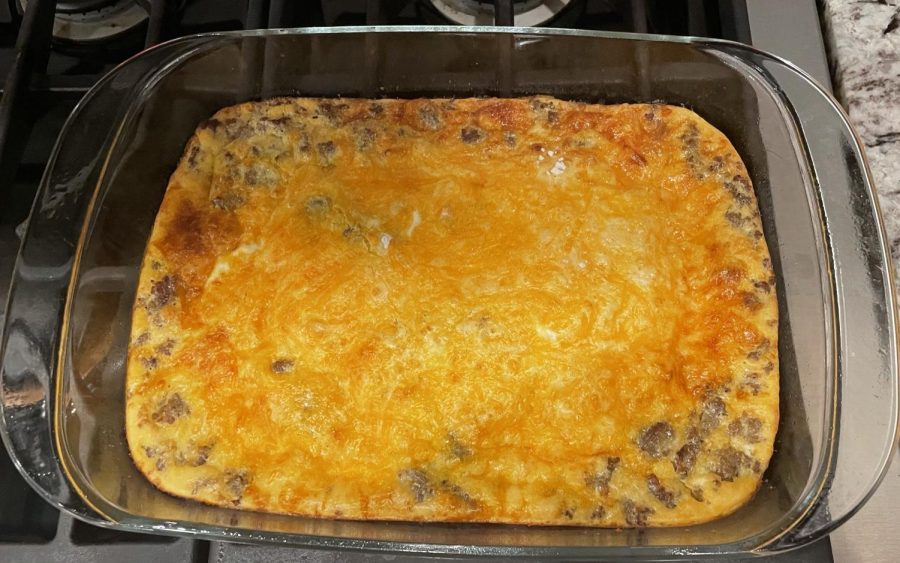
The egg sausage casserole lies ready to eat for holiday breakfast. The cheesy crust browned flawlessly in the oven.
Howell Christmas Egg Sausage Casserole
I walk into the kitchen Christmas morning surrounded by family, presents and most importantly, my mom’s Christmas Casserole. This delicious egg sausage casserole is one of my favorite things about Christmas morning.
This meal is simple and easy to make. Its clean up is under 5 minutes and it is only a 10 minute process to make. Another good thing about this meal is the ingredients can be found in your house. Its simplicity and tasteful end result makes this meal the best Christmas morning breakfast.
This Christmas tradition has been passed down through my family for years. My grandmother, who is an amazing cook, passed it down to my mom and she has made it ever since. This casserole is one of the main things that I look forward to all year. Sitting around the Christmas tree opening presents and eating this casserole brings my family together.
Despite the fact that this casserole is famous in my family around Christmas time, it is perfect year round. Its cheesy and fluffy taste is delicious at any meal. After the first bite, you will understand why it is such a big tradition in my family, and hopefully it will become a tradition in your family as well.
Ingredients
1 pound of browned sausage
4 eggs, beaten
2 cups of grated cheddar cheese
2 cups of milk
1 cup of Bisquick pancake and baking mix
Instructions
Preheat oven to 350F.
Cook sausage on medium heat until it is browned and crumbly.
Crack 4 eggs into a bowl and whisk.
Pour two cups of milk into the bowl.
Pour one cup of Bisquick into the bowl.
Add 2 cups of cheddar cheese.
Mix all ingredients.
Spread sausage into a 9-by-13 pan.
Add the mixture from the bowl onto the sausage.
Heat at 350 degrees for 20-30 minutes.
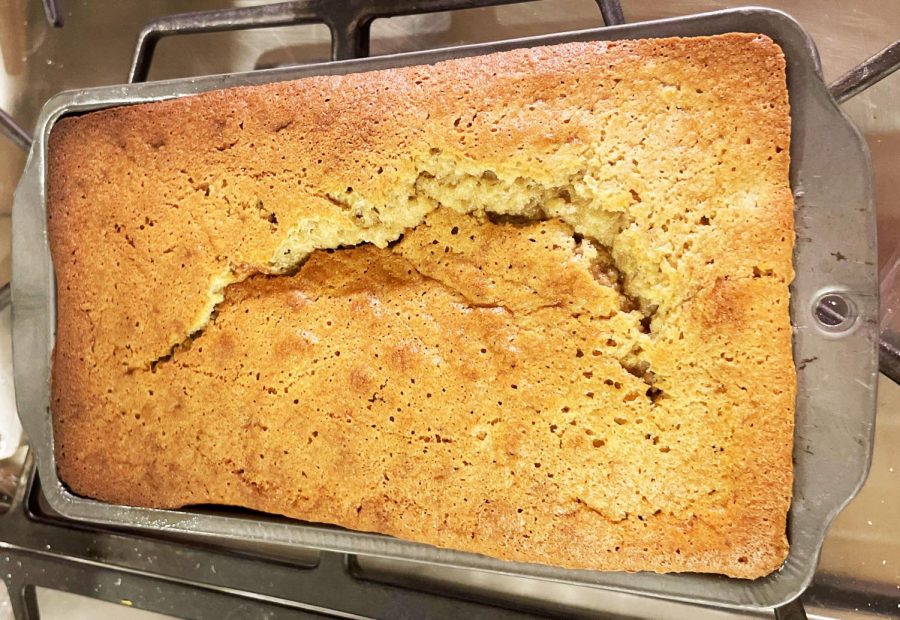
Mimi’s Banana Bread
Banana bread recipe passed down for generations still holds up
Many recipes have been passed down in my family, but the one that is the most memorable is the famous Mimi’s Banana Bread. The reason this one sticks out to me the most is because the first time we spent Christmas in Houston my aunt decided to bring the recipe back out. Ever since then, Mimi’s Banana Bread has always been my go-to treat around Christmas time and when the weather starts to get cooler.
Mimi was my great grandmother on my mother’s side of the family who loved to cook. Many recipes have come from her, but this is the one most important to my family.
When making this recipe I had to change up the flour to a gluten-free flour, but regular works too. Some tips I have learned along the way while making this recipe; make sure the butter is soft or even melted, use an electric mixer instead of doing it all by hand (it will save a lot of time and make sure everything is smooth), and also make sure you use the correct measurements.
In our family when we serve the banana bread, we do it in the morning as a little breakfast treat. You can enjoy Mimi’s Banana Bread all year long, but the best time is during the fall and winter and especially on Christmas morning. On Christmas morning each year while opening presents you have the smell of the banana bread baking in the oven.
There are many different ways to dress up your banana bread. Adding nuts, chocolate chips or even icing are simple ways to make the dessert even more enjoyable than it already is. In my opinion, chocolate chips add the best little touch to the banana bread. If you are not a fan of nuts, such as pecans and walnuts, definitely add chocolate chips to your loaf to give it extra flavor and varied texture.
To further enhance your banana bread, serve it with some hot tea or hot chocolate. I hope when you try this wonderful recipe you will enjoy it as much as my family does. This could be a new tradition in your family.
Ingredients
1 cup Butter
2 cups Sugar
6 Bananas
4 Eggs
2 ½ cups Flour
2 tsp Baking soda
1 tsp salt
⅓ cup semisweet chocolate chips (optional)
Instructions
First add the butter, sugar and bananas into a large mixing bowl and mix. For best results I recommend using a mixer throughout the whole process.
In a smaller bowl crack the eggs, and add in the dry ingredients (flour, salt, and baking soda). After you have the ingredients in two separate bowls, add the dry ingredients into a bigger bowl while your mixer is on low.
After you have all the ingredients mixed together, set the bowl aside. At this point you should only have one bowl.This would be the time to add in your choice of nuts, chocolate chips or even keep it the way it is.
You now need to grab a non-stick loaf pan and spray it with cooking spray to ensure your bread does not stick to the pan.
After your loaf pan is sprayed, add in the batter. After this is done your banana bread is ready to go into the oven for one hour.
After your banana bread is taken out of the oven, you will need to let it cool before taking it out of the pan.
Once cooled, you can take it out of the pan and place it onto a serving plate.
Once your bread is on the plate you can slice it to your liking.
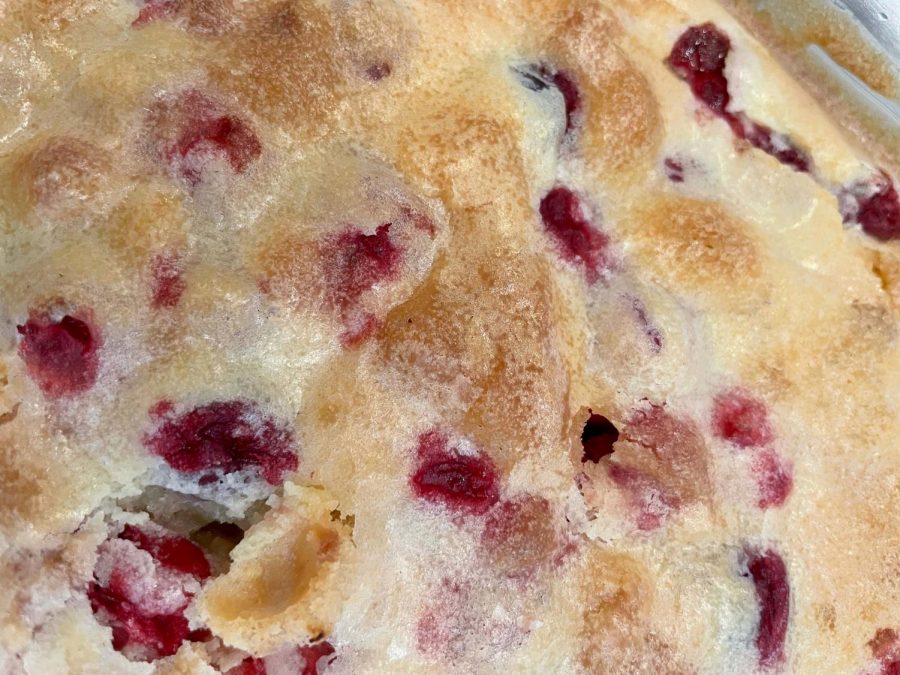
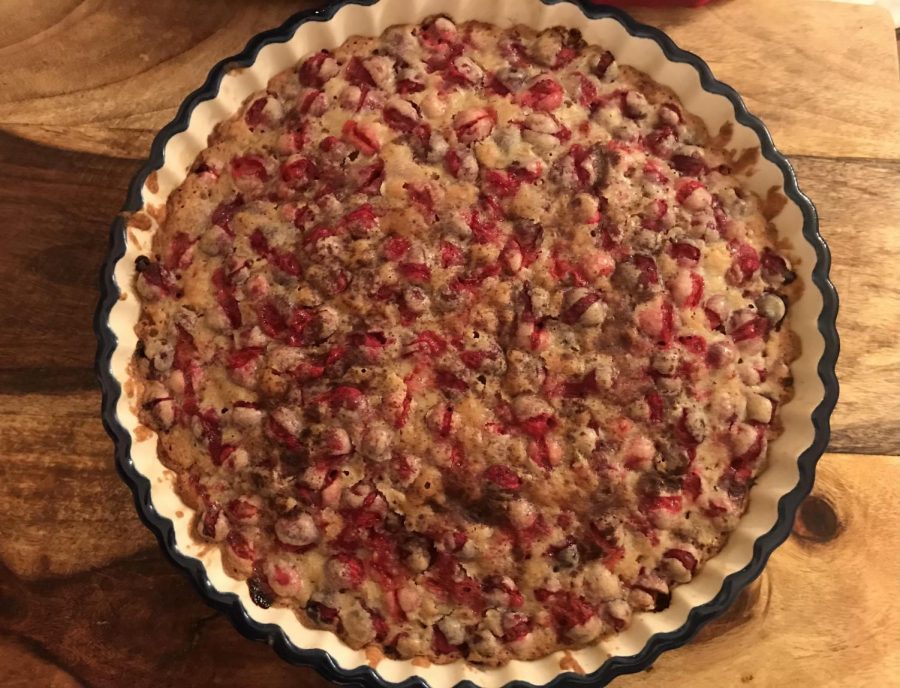
Once completely baked, the cranberry bread has a golden crust with bright red cranberries inside. Th bread is a holiday tradition in the Nugent family.
Nugent Family Cranberry Bread
Holiday dessert continues to be annual tradition
Making my family’s impeccable cranberry bread continues to be a holiday activity we participate in every year.
The recipe was passed down from my grandmother and is handwritten by her on a piece of notebook paper. The recipe is close to our hearts and our family is known to make this holiday treat often when it starts to become cold outside.
As a kid, I remember making cranberry bread sometimes twice a week. My mom would call me downstairs and we would bake the bread together. Since I was so young, my mom would get all the ingredients together and I would put my princess apron on and stir the batter with a matching princess spoon. We would then wait for the delicious bread to become golden in the oven and watch our stomachs grow hungrier, as we became more excited for the dessert to be ready to eat. The first five minutes the bread was out of the oven my older brothers and I would finish the entire thing. The next day, my mom and I would usually make another batch of the much loved cranberry bread for my family to enjoy and share with their friends. The taste of the squares reminds me of Christmas, Thanksgiving and some of my favorite childhood memories. Ten years later, we still make the bread about once every two weeks and eat it as a dessert, snack and for breakfast.
When cut, the bread is moist and filled with red cranberries. The cranberries turn part of the golden treat into a red, delicious looking treat. The almond extract incorporated into the recipe is a key component to the scrumptious taste of the bread. It allows for it to have a certain type of flavor that mixes well with the other ingredients. The top of the bread is crispy and the inside is soft and gooey. This allows for a mix of two different textures to create a sensational and flavorful bite.
When you bite into the cranberries, they pop in your mouth and create excitement in every bite you take. I think making food that incorporates different aspects into it can make eating more exciting. The contrasting textures and flavors allows for each bite to be delightful.
Ingredients
½ cup of sugar
2 eggs
1 ½ sticks of unsalted butter melted and cooled slightly
1 tsp almond extract
1 ½ cups of flour
2 cups fresh or frozen cranberries
Instructions
Preheat oven to 350 degrees
Butter 9 inch pan
Beat sugar and eggs
Beat in butter and extract
Add flour and stir by hand til blended
Stir in cranberries
Bake for 1 hour
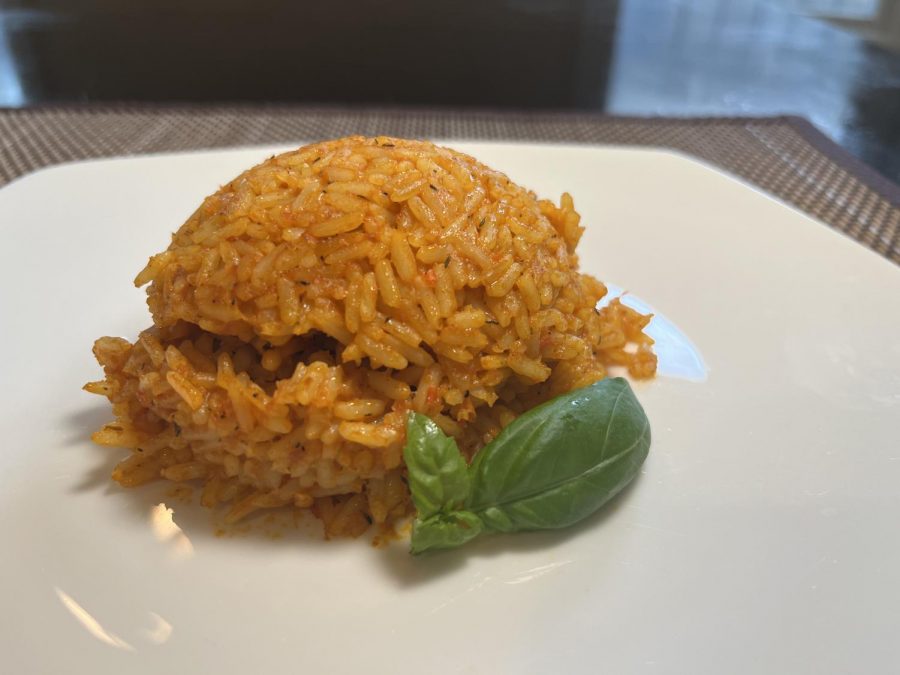
The coconut jollof rice when it has been plated and garnished with fresh basil. The coconut mik elevates the flavor of the rice.
Jeneta’s Coconut Jollof Rice
From weddings to graduation parties to every conceivable holiday, a warm plate of red-orange jollof rice is an ever-present constant at Nigerian functions.
Jollof rice is not only a Nigerian staple. The dish is widespread in West Africa, with different cultures having their own iterations, to the point where a Ghanaian and a Cameroonian might each argue that theirs is superior.
The basic components for jollof rice remain the same in most cases. It’s rice steeped in a seasoned tomato base. The spice levels and exact seasoning can be adjusted to personal preference, and it can be made with meat and without it.
My mom has been making jollof rice for the family for as long as I can remember, and as I grew older, I was able to share the experience of crafting and perfecting it with her. We would sometimes add more fresh tomato or less depending on what we had in our kitchen, and experimented with different flavors. The one adaptation that has endured is the addition of a can of coconut milk into the tomato base, which contributes a light sweetness that complements the spicy pepper flavor.
The following recipe is not the most traditional way to make jollof rice, but it’s our most prized family recipe, and it tastes delicious.
The first thing you should do is clean the parboiled rice with water. This also removes starch, making it less likely to stick during the cooking process.
Then, create the tomato-based sauce. You need a blender for this, so you can get the even orange color for which jollof rice is known. If you prefer a spicier dish, you can add some habanero pepper, but be conservative with it because it is HOT. I like my jollof rice spicy, but not that spicy, so I usually don’t opt for habanero.
Next, bring out a pot. In our household, this pot is ordinarily huge, because we like to make enough rice to feed a five-person household for days on end. Though the amounts in this recipe are scaled to serve 12 people, pay attention to the portions and be sure to change amounts to fit the pot you use to cook if necessary.
You’ll finish the sauce in the pot by adding oil, tomato paste, coconut milk, broth, salt, herbs and spices and add the rinsed uncooked rice. Cook, stirring occasionally to prevent burning. It can happen in the blink of an eye if you’re not careful, so pay attention.
The result is a pot of mouth-watering warm orange rice that balances spice perfectly with sweet coconut. The fresh ingredients make a huge difference by lifting the flavor, as opposed to a more processed salty version of the dish. While that version is tasty, it doesn’t have that wholesome, robust flavor that elevates the dish to the superior holiday centerpiece.
Ingredients
3 cups of parboiled rice
One red bell pepper
Two roma tomatoes
1 tablespoon of minced ginger
Two cloves of garlic
One-half medium yellow onion
5 tablespoons of tomato paste
3 tablespoons of vegetable oil
One 13.5 ounce can of coconut milk
2 cups of chicken or beef broth
1 teaspoon of Curry powder
1 teaspoon of thyme
½ teaspoon of cayenne pepper
One pinch of ground nutmeg
1 bay leaf
1 tablespoon of salt
Half a habanero pepper (optional)
Fresh basil leaf (optional, for garnish)
Instructions
Blend tomatoes, ginger, garlic, onion, bell pepper together until smooth. If you are opting for habanero, you would add it here.
Heat oil in a 3.5 quart sauté pot or pan for one minute on medium heat.
Pour in the tomato mixture and heat until boiling. Cook on high heat until you can see the oil floating on top, about five minutes.
Add tomato paste, mix thoroughly, and cook for ten minutes. Place on low heat and add coconut milk, broth, thyme, curry powder, nutmeg, salt, black pepper, bay leaf, and cayenne pepper.
Turn heat up to high and bring the covered pot to a rolling boil, stirring occasionally. Allow to boil for one to two minutes.
Turn off the heat and add rice. Turn heat back to high and bring to a boil, stirring occasionally to make sure rice does not stick to the bottom.
Once boiling, cover and set to the lowest heat possible. Cook until all liquid is absorbed, about 30 minutes, still stirring occasionally to prevent sticking and burning. After turning heat off, let sit covered for at least 15 minutes. Remove the bay leaf.
Serve. Garnish with fresh basil leaf if desired.
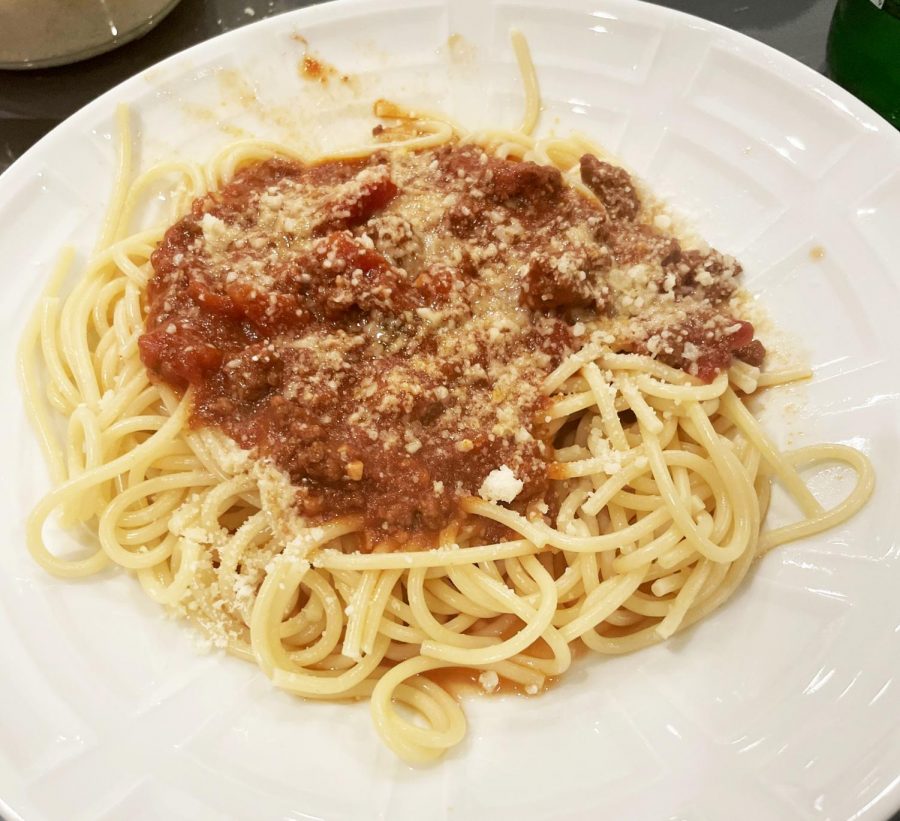
Lazzaro Family Red Sauce Pasta
Inherited by each generation of the Lazzaro family, red sauce pasta with spaghetti noodles is an irreplaceable holiday tradition.
My great grandmother’s parents came over from Italy, so they are the main origin of this recipe. Every generation of the Lazzaro family is taught this recipe so it will stay in the family for years to come.
When my family makes this recipe we usually do it together while listening to music, which makes the time go by faster. The process of seeing everything mix together thoughtfully is pretty outstanding.
When the pasta is first served, there are noodles with a little sauce on it, but there is a separate bowl just for the meat sauce.
Once you take the first bite of the pasta you can taste all the flavors from the oregano to tomatoes. If you have a low tolerance for heat then I would put parmesan and salt in it so the spicier flavors are balanced out.
My personal favorite part of the dish is dipping bread into the sauce. You can either dip garlic or regular sourdough bread. It is very common in my family to complement this dish with different types of breads.
I also love to pick out the meat because the flavor is strong and rich from having been infused with the sauce for so long. However, the flavor from the meat on its own is fantastic.
The sauce can be used separately for different things besides pasta. In past years I have used the sauce in sandwiches or tacos.
This pasta is very much a family meal due to how much you get from the ingredients, so be prepared for leftovers. My family loves to give the leftovers to extended family and friends so they can enjoy it at home and we don’t have to worry about having an excess amount of pasta in the fridge.
Making the dish does take a good few hours, but all in all what you get out of it is extraordinary. When making the dish make sure to use a big skillet for both the pasta and sauce because you do not want your pasta to be drowned in the sauce.
While the process of making the pasta is a lot of fun, the clean up is long and difficult because of the big mess that results from making the recipe. That being said, it is well worth a delicious and hearty meal.
Ingredients
4 tablespoons of olive oil
1 lb lean ground beef
.5 lb bison
.4 lb hot Italian sauce
6 garlic cloves minced
1 750ml bottle of chianti
6oz of tomato paste
28 ounces of tomato sauce
28 ounces of diced tomatoes
5 stems of fresh basil
1 teaspoon oregano
2 teaspoons of agave nectar
1 teaspoon of salt
1 teaspoon of pepper
One onion cut in half
Instructions
Combine all the meats with a pinch of salt and pepper
In large skillet heat two tablespoons of oil and saute two minced cloves of garlic
Add meat mixture and brown
Strain meat mixture and set aside
In large dutch oven heat remaining olive oil and saute remaining garlic
Add tomato paste and cook on moderately high heat until some sticks to bottom of the dutch oven
Add 6 oz of wine (use tomato paste can to measure)
Add ¾ of the bottle of win and all of the remaining ingredients
Bring to a boil
Lower heat and simmer 3-4 hours adding the remaining wine after the first hour
Sauce is finished when thick
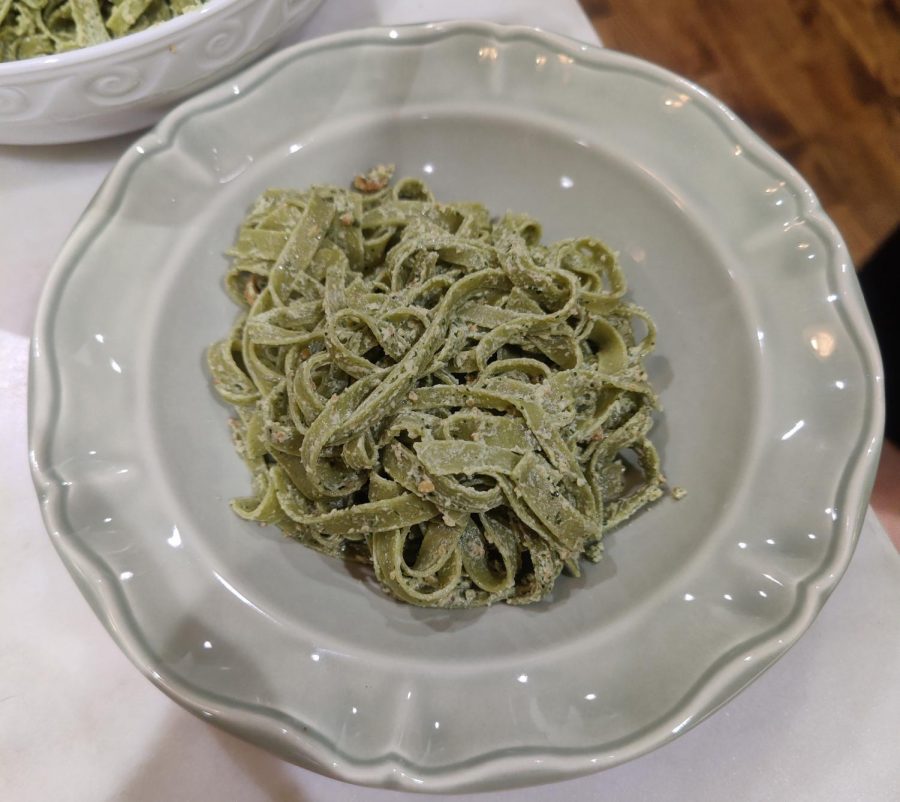
The tagliatelle once it has been plated and topped with the hazelnut pesto. The pasta roots trace back to Liguria, Italy.
Winandy Family Tagliatelle With Hazelnut Pesto
Tagliatelle with Hazelnut Pesto is one of my favorite dishes of all time and on special occasions, we cook it.
I learned this recipe from my grandmother. She says that it has its origins in Liguria and was first used in the Duchy of Savoy in the Renaissance. The recipe reminds me of home and brings back memories of a care-free past.
I remember being taught how to make it in the summers I spent in Italy and I was just as fascinated by the history of the dish, as I was the actual product. Making Tagliatelle was and still is very time consuming unless you use a machine, but in the end, when you see the faces of people eating it, it is worth all the work.
I vividly remember eating it in our house off of the little town Montelupo Albese in Italy. We still make Tagliatelle by hand because it allows us to customize the flavor of the pasta to our liking. To make it more airy, we whisk the dough until it is almost white. Knowing the effort that goes behind it makes it taste even better.
The ingredients needed are two garlic cloves, one cup of fresh basil leaves, a quarter cup of shelled hazelnut, one cup of low fat cheese, eight ounce of dried tagliatelle, salt and freshly ground black pepper.
You can buy pesto from the shelf, but I believe that it tastes better when you make it yourself. The finished product has a taste similar to pesto because of the hazelnuts and the garlic, and should taste like such. The basil acts as a base upon which the hazelnuts and garlic build upon. Generally with Tagliatelle, the texture is porous and rough, so sometimes my family substitutes the Pesto for Bolognese sauce. This meal has been passed down for generations and our ingredients are all made in northern Italy of the finest quality. For a nuttier taste, add a quarter cup of a nut of your choice. I have never met someone who has not genuinely enjoyed this meal.
Tagliatelle Pesto is a beautiful food with rich history and an ever richer taste, from the earthy basil, to the mild Tagliatelle, each ingredient pitches in to provide a taste, I cannot fully describe what it tastes like, but tasting it will take you to the mediterranean and experience a piece in the life of the Duces of Italy.
Ingredients
2 garlic cloves
1 cup of fresh basil leaves
1/4 cup of shelled hazelnut
1 cup of low fat cheese
8 ounces of dried tagliatelle
A pinch of salt
A pinch of ground black pepper
Instructions
First, place the crushed garlic, basil, hazelnuts and cheese in a blender or a food processor and process into a thick paste.
Meanwhile, cook the tagliatelle in lightly salted boiling water for about 10 minutes until al dente, or 15 minutes if you would prefer a softer pasta, then drain well.
After, separate the water from the pasta and spoon the pesto into the container and toss lightly until melted.
Grind black pepper and salt onto the pasta and you’re done.
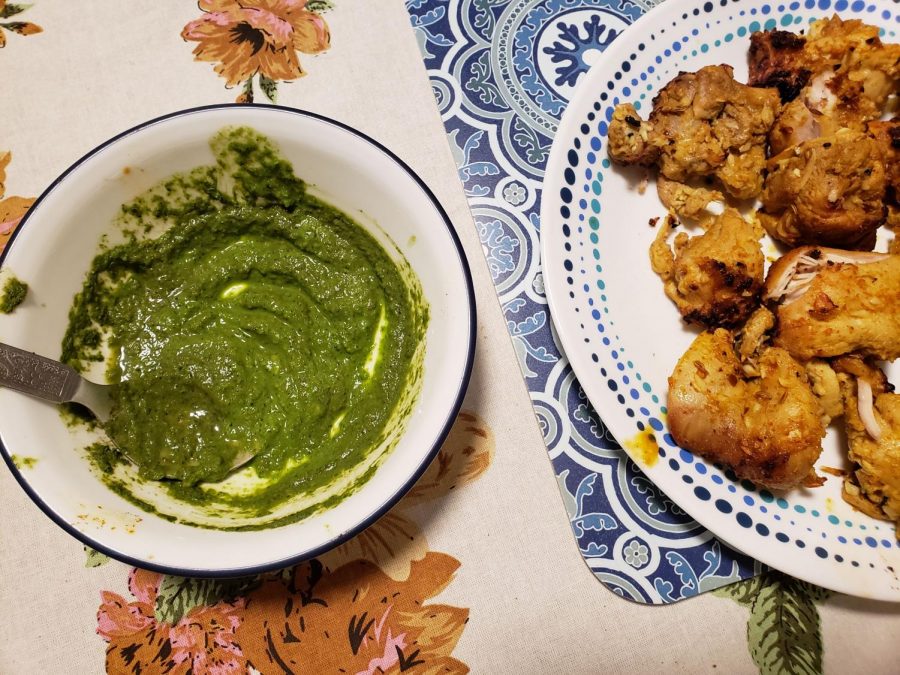
The chicken tikka BBQ sits beside the cilantro chutney, freshly plated. It was the gift of choice for my cousin when my family met her newborn son.
Laharia Family Achaari Chicken BBQ
My father’s take on the classic Indian dish achaari chicken tikka is what first comes to mind when I consider holiday foods. These bite sized pieces of chicken, marinated in flavorful spices, grilled to perfection and paired with a cool cilantro chutney, always comfort me and remind me of home.
My dad’s take on the North Indian tradition of kebabs and drinks is a bit unconventional, catered to my sibling and I’s American tastes and lack of spice tolerance. This dish is always made for special occasions. For example, the last time I enjoyed this dish was when we brought it to my cousin’s house to visit her 6-day-old baby for the first time.
It is important to note that this recipe serves around four people, needs time for the chicken to marinate for a minimum of four hours, and requires a packet of seasoning that can be found easiest at one of Richardson’s many Indian grocery stores.
To make this version of achaari chicken BBQ, you will need two gallon-sized Ziploc bags, some skewers, and a baking tray. You will also need chicken thighs cut into pieces. My dad prefers to go to Central Market and have the butcher cut the meat there, but you could chop it at home if you wish. This recipe also requires finely chopped garlic, which, once again, my dad prefers to buy pre-chopped at Central Market, but can be done at home. You will need lime juice, mustard seed oil and salt. You will also need an Achar Gosht seasoning mix that you can pick up at any Indian grocery store. My dad prefers a store called Indian Bazaar in Richardson.
To make the cilantro chutney, you will need a blender, cilantro, garlic, salt, green chiles to your taste and plain yogurt. You can also add some coconut, shredded or whole.
The sharp tang of the chicken makes my eyes water with the first bite, but the cool chutney soothes my tongue. The contrast between the two flavors is entrancing.
This dish has the familiar kick of Indian spice that reminds me of the delicious smells circulating in my grandmother’s kitchen. It has been years since I last visited her house, but I can still perfectly envision the comfortable way she moves through the cooking process.
Chicken Ingredients
8 chicken thighs, cut into 2-inch pieces.
8 cloves of garlic, finely chopped
1⁄3 cup of lime juice, usually from 3-4 limes
1/3 cup of mustard seed oil
1 teaspoon of salt.
Achar Gosht seasoning mix
Cilantro Chutney Ingredients
1/2 bunch of cilantro
1 clove of garlic
1/4 teaspoon of salt
1 to 2 green chiles, to taste
4 teaspoons of plain yogurt
1 1/2 tablespoons of coconut, shredded or whole (optional)
Instructions
Double bag the lime, mustard seed oil and Achar Gosht seasoning with two gallon-sized Ziploc bags and mix it up.
Add the chicken. Leave to marinate in the refrigerator for a minimum of four hours, but even overnight if you wish.
Preheat the oven to 375F.
Add the salt into the bag and mix it in. Put room-temperature marinated chicken on the skewers, then leave them in the oven on a baking tray for around 35 minutes.
To make the chutney, in one blender, add the cilantro, coconut, garlic, salt, chile and yogurt. Taste the mixture and add more salt or chile if you wish.
Remove the chicken from the oven after 35 minutes and serve with the cilantro chutney.
Gaffey’s Coffee Pecan Fudge
Perfect dessert for chocolate and coffee enthusiasts
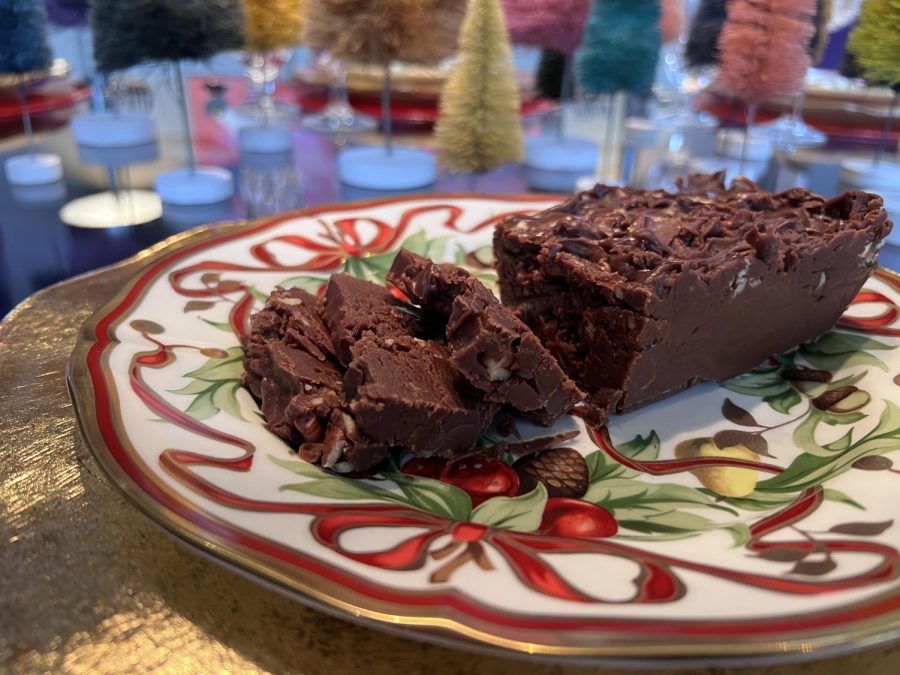
Dating back four generations, this peculiar yet tasty coffee pecan fudge recipe is a tradition in the Gaffey family and is perfect for the holiday season.
My great great grandmother was the first person to bake this recipe, though it has evolved much throughout history.
With the passing of my great grandmother, the recipe was unfortunately lost as it hadn’t been written down anywhere. Because of this, Sue White, my grandmother, and Shelley White, my mother, both worked together to reinvent the recipe, improving it with their own unique twist in the process.
The secret ingredient they added to this delicious fudge is instant coffee which gives the fudge it’s signature caffeinated kick.
Coffee isn’t for everyone, though, and that’s perfectly fine as our recipe is easy to modify to your liking. You can easily scale the amount of instant coffee to your preference in order to lower the intensity of the coffee flavor or you can just get rid of it to begin with. In the case of a nut allergy, removing the pecans is another option which won’t affect the taste much at all.
After all, one of fudge’s best qualities is this unusual simplicity. Simply take a bunch of sweets and some dairy products and ta-da, you have yourself some tasty fudge.
All of the ingredients should be available at the majority of grocery stores in the area, with the possible exception of instant coffee which can be purchased at your local Starbucks.
The recipe only takes about 20 minutes to finish and an extra 10 minutes to cool, so if you are quick you can easily make a warm batch right before company arrives.
As shown in the image, this dish’s presentability is up to par, though the pecans make it slightly tough to slice into even pieces. I recommend keeping it whole for as long as possible if you plan on putting it on display.
Taste-wise, the dessert is impeccable. The pecans complement the extremely bitter taste of the coffee in a way that no other desserts could ever dream of matching. The chocolate itself hits the perfect ratio, cutting back on its sweetness while simultaneously giving the dish it’s signature cocoa flavor.
Maybe it’s just me being sentimental, but every time I take a bite out of this fudge I can taste its rich history swelling in my mouth.
Ingredients
2 cups sugar
½ cup butter, cut into pieces
2 tablespoons instant coffee granules (optional)
⅛ teaspon salt
1 (5 ounce) can evaporated milk
12 large marshmallows
1 cup semisweet chocolate morsels
1 cup chopped pecans, toasted (optional)
1 teaspoon vanilla extract
Instructions
Combine the first 6 ingredients in a 4-quart heavy saucepan. Cook over medium heat, stirring constantly, 10 to 15 minutes until sugar dissolves and marshmallows melt. Bring to a boil. Cook, without stirring, until a candy thermometer registers 234 (soft ball stage). Remove from heat.
Stir in chocolate morsels until melted. Stir in pecans and vanilla. Spread fudge immediately into 2 aluminum foil-lined, buttered 5 3 ½ mini loaf pans. Cool completely. Remove fudge from pans. Slice fudge into ½” slabs. Yield 1 ⅓ pounds.
Note: Lining the loaf pans with aluminum foil and buttering them makes it easy to remove uncut fudge from the pans in one piece to slice it.
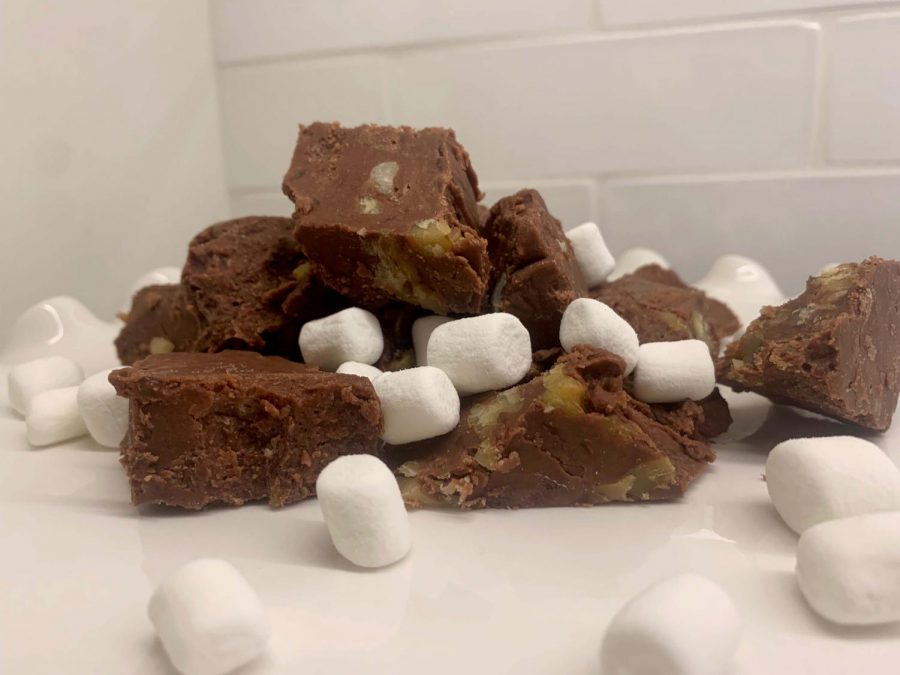
Paring the fudge with the mini marshmallows makes the fudge look more appetizing. This combination was a favorite of my mom and her siblings.
Johansen Family Fudge
Chocolate dessert perfect for the holidays
My grandmother, Renie, began making fudge for my mom, aunt and uncle when she discovered the recipe on the back of a Kraft Jet-Puffed Marshmallow Jar.
Since the discovery, and adjusting the recipe slightly, the fudge has been a commonplace at family gatherings.
While fudge is often thought of as a winter dessert, my family sees its versatility as a year-round treat. It is especially lovely in summer because the recipe doesn’t require baking in the oven which can be especially troublesome in the warmer months because of the extreme heat.
We have fudge for Easter, Thanksgiving, Christmas and birthdays. The burden of hosting family events has fallen to Renie and my grandpa, but in recent years my mom has taken on the responsibility because of the passing of my grandpa and Renie’s increasingly limited mobility.
As the host, my mom knows no family reunion would be complete without the beloved dessert. She has become more confident in her cooking skills recently and has begun to experiment with the recipe.
While she wouldn’t dare try to substitute the marshmallow creme because that’s what gives the fudge its unique, soft texture, she has made some substitutions.
Instead of walnuts, pecans are a delicious replacement. Another walnut substitute in case someone is allergic to tree nuts is one cup of semi sweet chocolate chips. Personally, I prefer the walnuts or pecans because I find the chocolate chips to be a little overkill, but my sister, who is allergic to nuts, loves this version.
There are also more ways my mom has managed to spice up the fudge squares. You can melt semi sweet chocolate to dip the squares into. After coating the fudge in chocolate, leave the squares in the fridge until the chocolate has hardened. This addition is especially delicious with the walnut version of the fudge.
For a lower effort form of this twist, drizzling chocolate syrup on the fudge then giving the treat time to cool in the fridge is also great. Using dark chocolate syrup is preferable so the dessert doesn’t become too sweet and the taste remains balanced.
To make the treat more appropriate for certain holidays my family has become very fond of the seasonal fudge variations recently thanks to my mom.
For Thanksgiving use a 1/2 cup of pistachios and a 1/2 cup of dried cranberries instead of walnuts. These textures and flavors compliment the fudge wonderfully and really give the dessert more of a holiday feel. For nut allergies the pistachios can easily be replaced by a 1/2 cup of white chocolate. The cranberries are the star of this version of the fudge because the sour, almost bitter flavor is in perfect harmony with the richness of the fudge.
For winter holidays replacing the walnuts with a cup of white chocolate chips and a teaspoon of peppermint extract is the perfect spin on the dessert. The minty flavor makes the fudge more festive and the white chocolate chips add a unique sweetness.
Regardless of the occasion any variation to this fudge recipe makes for a delicious dessert.
Ingredients
3 cups sugar
3/4 cup butter
2/3 cup evaporated milk
16 oz. semi sweet chocolate
1 jar Kraft Jet-Puffed Marshmallow Creme
1 cup chopped walnuts
1 tsp. vanilla
Instructions
Line 9-inch square pan with foil, with the ends of foil extending over sides
Put sugar, butter and evaporated milk in a saucepan and bring to a rolling boil for 4 minutes and stir constantly then remove from heat
Add chocolate and marshmallow creme then stir until melted
Add nuts and vanilla; mix well
Pour into the prepared pan and allow the mixture to cool completely
Use foil handles to lift fudge from pan and cut into square
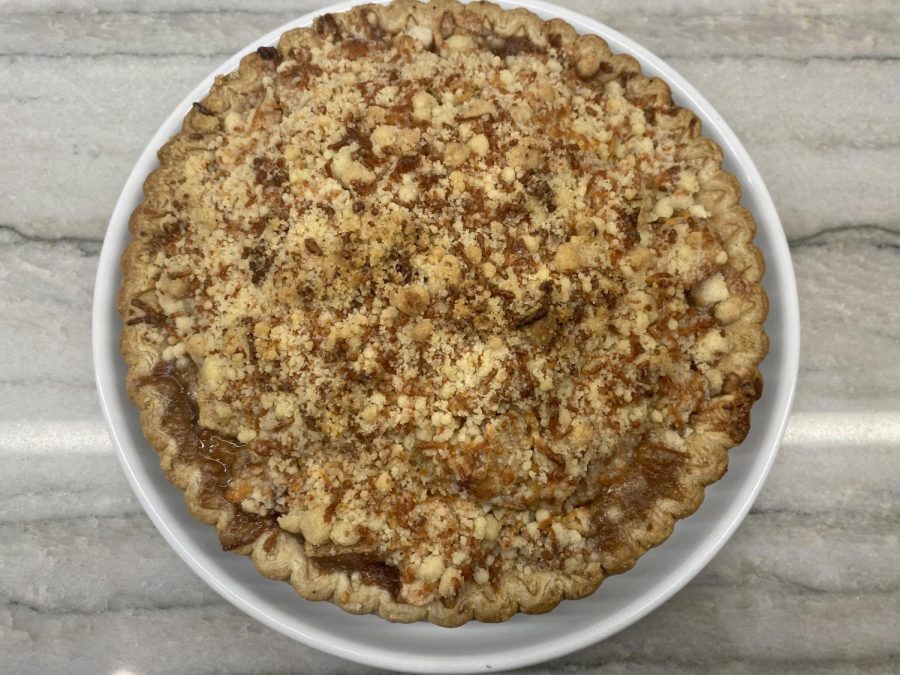
The apple pie once its out of the oven. Topping it with vanilla ice cream is the perfect way to complement it.
Leyrer Family Apple Pie
Ever since I can remember, apple pie has always been a celebratory dish in our household.
My mom’s apple pie is incomparable and practically unmatched from its uniqueness in spices and secret ingredients to even its messy presentation. Every bite is a mouthful of warm spiced seasonal goodness that is to be savored.
My mom’s recipe has been in our family ever since she was gifted a cookbook from her sixth-grade class back when she was a teacher. Her student Harper wrote to my mom that her family’s apple pie recipe has been in her family for generations.
From what I can remember the holidays in my house have always been filled with cheer. My fondest memories of the holiday time include decorating the tree with my mom while listening to our favorite Christmas classics, putting wreaths on the exterior of our home with my dad, binge-watching The Grinch and Elf with my best friends and of course, baking with my mom and grammy. My grammy has always been an influential person in my life, especially in the kitchen. She has inspired me to be passionate about my work and has practically taught me everything I know about baking, except for my mom who happened to be the one who walked me step by step in learning how to make her infamous apple pie.
My mom’s apple pie has a special place in my heart. The sweet sweet aroma takes me home and reminds me of togetherness, the taste of sweet cinnamon unlocks the celebratory memories I made as a child, this childhood recipe never fails to make my day, it is simply perfection.
The pie’s predominant flavor comes from the apples. It consists of six apples, however, we find that having a variety of apples gives the pie depth and automatically takes the flavor game up a notch.
To complement the sweet cinnamon taste of the apple filling, this dish is best served hot with a dollop of french vanilla ice cream on top. This delectable treat will surely satisfy all your sweet tooth cravings.
Ingredients for filling
6 apples peeled and slices
¾ cup sugar
¼ cup flour
1 tsp. cinnamon
1 tsp. grated lemon peel
⅛ tsp. cloves
⅛ tsp. salt
Flour mixture poured over apples
Ingredients for crumble topping
Pie Crust either store bought or homemade
1 cup flour
½ cup sugar
½ butter (or ⅓ cup butter and no cheese)
1 cup shredded cheese
Instructions
When it comes to cutting the apples it’s important to remember that variation is key in this recipe. The apples should be washed, peeled (preferably leaving some skin on the fruit for texture purposes but to each their own), and cut into chunks. Once all your apples are cut and peeled to your desired liking next comes incorporating the flour and spice mixture in with the apples.
In a large bowl combine the two until the flour mixture has coated each apple. It does not matter if you use homemade or store-bought pie crust as long as the crust itself has a deep dish.
The crumb topping consists of four ingredients. These ingredients should be combined in a separate mixing bowl.
To assemble the pie the first step is to pour the coated apples into the pie crust then add however much of the crumb topping you would like on top.
The oven should be heated to 400 degrees celsius and the pie should bake from anywhere between 40 and 45 minutes.
When it’s done cooking cover with foil for the last 15-20 minutes.
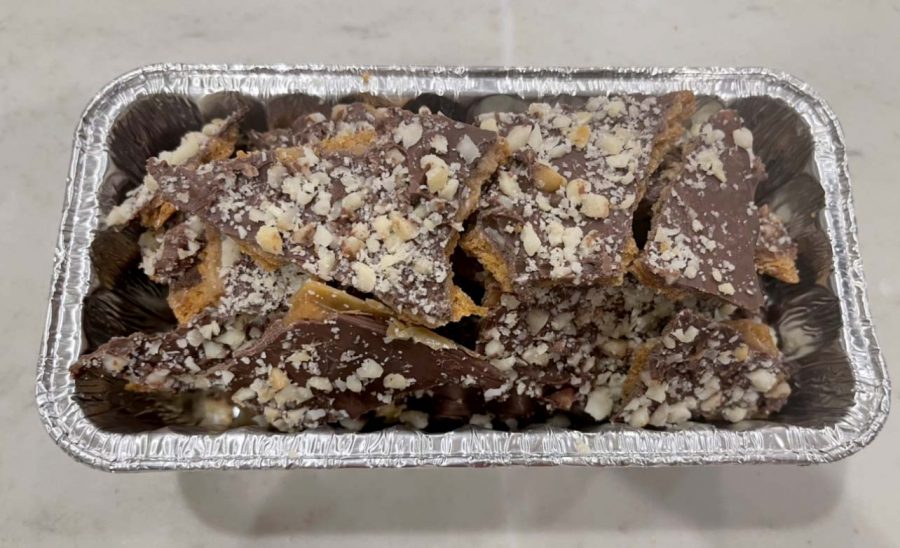
The final product of the Graham Cracker Toffee recipe. The dessert is made using graham crackers, chocolate chips and macadamia nuts.
Polychronis Graham Cracker Toffee
Toffee isn’t the first thing someone would think of when it comes to a holiday treat.
Most would think of cookies or gingerbread or peppermint or fudge or hot cocoa as a holiday treat to indulge in as you snuggle up underneath a warm blanket and watch holiday movies. But that’s what makes the Graham Cracker Toffee different. It’s not a typical sweet, yet it’s a treat you can’t refuse.
My mother found the Graham Cracker Toffee recipe online and has made it annually for family get-togethers for many years. She always puts it amongst other chocolatey treats like fudge on a small tray. It has never been the star of the show against all the savory and more recognizable sweet treats, but it has never disappointed anyone who has tried it. To her, it has always been a quick and easy way to bring a smile to someone’s face.
I remember the first time I tried this toffee. When I bit into it, I needed more. I didn’t care if it was going to give me a stomach ache, all I knew was that I needed more.
When you bite into this toffee, a lot of flavors will start to dance in your mouth like a ballet performance of The Nutcracker.
The crispiness and the crumbliness of the sweet graham crackers mixed with the overly sweet and rich chocolate chips bring quite a sugar bomb. However, the macadamia nuts add a pinch of saltiness and crunchiness to the toffee to tone down the sugar bomb, making this treat a complete tasting experience. The overall taste of this toffee is that of a simple candy that brings the spirit of the holidays into your body.
This toffee isn’t hard to bite into like some toffees. It’s not like chomping down into a brick that’ll ruin your tasting experience. It’s like eating a candy bar or even a granola bar. Firm, yet enjoyable.
Best of all, it’s something you can’t stop eating. You’ll crave it at school, at work, at home and the taste will never go away.
The Graham Cracker Toffee recipe is a simple treat with an amazing combination of flavors for anyone to enjoy throughout the holiday season. Personally, this is a sweet treat to help my family and I get into the spirit of the holidays as we wait for Christmas.
Ingredients
½ pound (two sticks) of butter
¼ cup of brown sugar
¼ cup of granulated white sugar
½ box of graham crackers (not crumbs)
2 cups of semi-sweet chocolate chips
1 cup of chopped macadamia nuts
Instructions
Preheat the oven to 350 degrees. Line a 10-by-15 inch jelly roll pan with non-stick foil. Arrange whole graham crackers to fit the bottom of the pan in a single layer, breaking up the last few to fit the space.
Melt butter in a medium saucepan over medium heat. Add brown sugar and white sugar to the mixture. Stir to combine. Bring the mixture to a boil. Reduce the heat and let the mixture gently bubble for 4 minutes. Remove from heat.
Carefully pour sugar/butter mixture evenly over the graham cracker layer. Spread to cover. Bake for 20 minutes.
When done, remove from the oven and let rest until bubbling subsides. Sprinkle chocolate chips evenly over the top. Wait about 2 minutes for the chocolate to melt, then use a spatula to gently spread the chocolate chips into an even layer on top of the toffee graham crackers. Sprinkle the chopped macadamia nuts over the toffee, pressing down gently into the chocolate.
Cool to room temperature, then refrigerate for 2 hours. Peel the foil from the chilled toffee. Break into two-inch irregular pieces.
Refrigerate any leftovers.
Yield: about one pound of toffee
Note: For a variation, use a combination of graham crackers, saltines or butter crackers, substitute dark chocolate for milk chocolate and honey-roasted peanuts, pecans or walnuts for extra decoration.
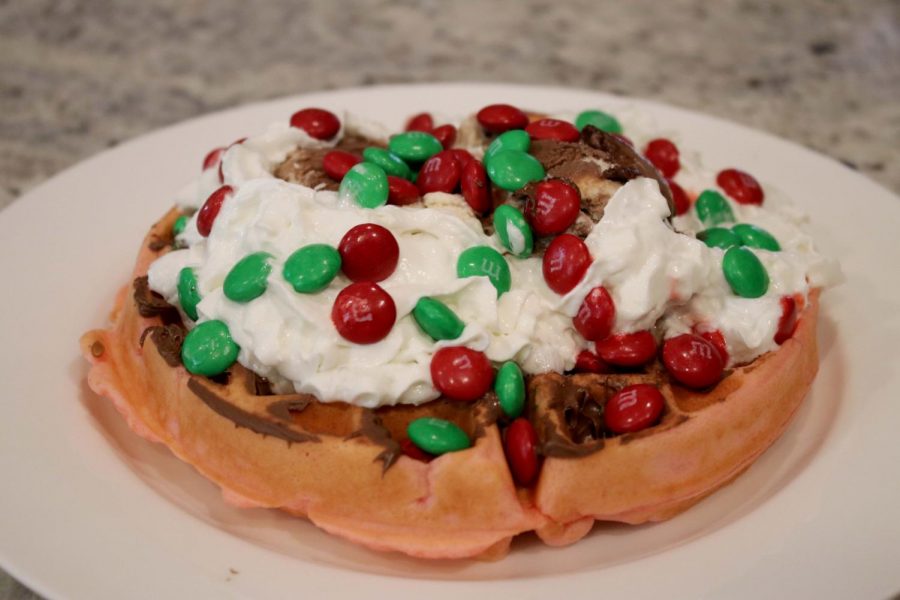
The Christmas waffle once it has been fully decorated. The holiday treat was first created with leftover Christmas party ingredients.
Segal Christmas Waffles
Dessert combines Nutella, whipped cream, M&M’s
Each family has different traditions and recipes they make, especially during the holidays. In my family, every Saturday morning of December leading up to Christmas, we make Christmas waffles. These are waffles dyed with red food coloring, Nutella spread on top, two scoops of Ben and Jerry’s “Half Baked” ice cream, whipped cream and decorated with Christmas M&M’s.
This was created by me and my younger sister in 2010 and has been one of our favorite holiday foods ever since. One day for breakfast in December 2010, we were not feeling the Christmas spirit and craved something sweet. We decided to make waffles because they were sweet and we wanted to dye them red to represent Santa and Christmas. My parents had just hosted a party the night before, so we used all the leftover sweets in the house and put it on the waffles. It tasted amazing. We were in awe because we have never tasted something so delicious before and we decided to name them Christmas waffles. At that moment we knew we had to make Christmas waffles a tradition.
These waffles are definitely a family favorite. It’s not only the taste of the waffle that makes it special, but also the memory of making it with my family. The color of the waffle and the Christmas m&m’s make it festive and more exciting to eat. The ice cream on the waffle for breakfast makes it even more special because kids are usually not allowed to eat dessert for breakfast so if the whole family is eating it, it means that something good is about to happen, which is Christmas.
The waffle itself tastes like a masterpiece. The sweet waffle melts in your mouth and then is washed down with all the goodies on top. It is also fluffy and not dense, so when eaten with the other toppings it is not too filling.
Some people think this waffle is too sweet, but that is not the case. All the ingredients in the waffle balance each other out, so nothing is too overpowering.
The salt in the batter helps balance out the sweetness from the waffle and the sugary toppings. The warmness of the waffle balances out with the coldness of the ice cream and the whipped cream also acts as a median because it melts, so when eaten, the temperature of the waffle is neither too hot nor too cold.
Since the waffle is warm and the ice cream is cold, subconsciously it doesn’t feel like you are eating too much sugar because it tastes different and is in different forms, therefore allowing you to eat more of it. The M&M’s, Nutella and the chocolate part of the “Half Baked” ice cream also balance the waffle and vanilla flavors so that neither the vanilla nor the chocolate are too overpowering. The balance of the waffle creates a grand flavor that is satisfying to the mouth.
Thanks to the exciting ingredients, you can’t help but smile every time you look at it. It is loaded with so much goodness, making it my all time favorite holiday treat. It’s always a winner.
Seeing all your favorite toppings stacked on a delicious waffle, can’t be beat. I highly recommend making it with your family. You will not be disappointed.
Ingredients
2 cups all purpose flour
1 tablespoon white sugar
4 teaspoons baking powder
¼ teaspoon salt
2 eggs
1 ¾ cups milk
½ cup vegetable oil
½ teaspoon vanilla extract
About 5 drops of food coloring
All toppings optional
Instructions
First, preheat your waffle iron.
Beat the eggs, milk, vegetable oil, vanilla extract and food coloring together.
Then combine the all-purpose flour, white sugar, baking powder, and salt into the mixture, and continue to beat it until well incorporated.
Pour about 1 cup of batter into the iron and cook for about 4 minutes or until desired crisp.
Makes about 6 waffles.
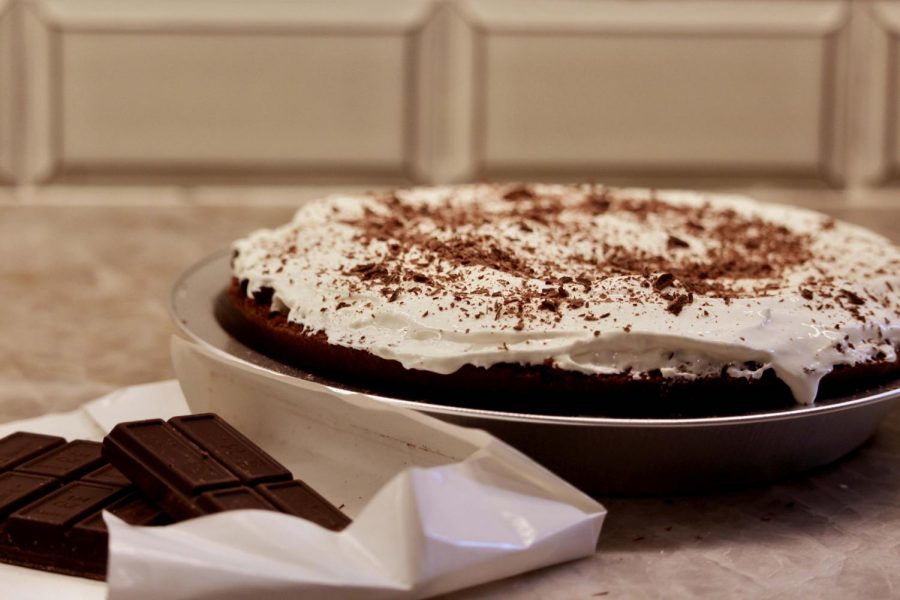
Nana’s Christmas-Birthday Chocolate Cream Pie after being prepared. The pie spends at least eight hours in the fridge before it is ready to be served.
Harrell’s Famous Chocolate Cream Pie
Pie marks start of holidays and spending time with family
For most households, including mine, the holidays mean spending a large amount of time with relatives.
We usually have multiple grandparents, maybe an aunt staying with us over the break, and sometimes an extra dog or two. Along with the craziness of the holidays, we celebrate a birthday right in the middle.
My dad’s birthday falls on December 26th, the day after Christmas.
He jokes that the day is a whole holiday in itself and since it’s right after everyone’s favorite day, the family makes an effort to have it stand out. This means extra celebration, gifts, and most of all, food.
My fraternal grandmother, who we call Nana, is an excellent chef and loves to cook and bake.
For example, she has a special chocolate cream pie that she makes my dad every year for his birthday. Since she lives in Houston, she always arrives at the house with her luggage, gifts and her cooking utensils for the pie.
The recipe is written on a weathered, torn and stained standard notecard in my grandmother’s easily recognizable block handwriting. In her other recipes, there are sometimes small doodles of the foods next to the ingredients or instructions.
The pie takes more than a day to make because it requires a night in the refrigerator. Ever since I could remember, whenever Nana stayed with us, we spent the days leading up to Christmas and my dad’s birthday running around the kitchen.
Frankly, we made a huge mess.
The counters would be littered with splashes of ingredients, the floor layered with crumbs, and the sink overflowing with pots, pans, and spoons.
The dogs usually have a field day cleaning up after our spills. I think they enjoy the pie as much as we do.
When we were younger, my sister and I would help up until we got to the double-broiler step, retiring from baking to find something that would capture our attention. We would return every once in a while to dip a finger into the filling or to help with the dishes when prompted from my mom.
However, my grandmother would happily take on the rest of the baking and cleaning when we chose to sit it out.
Now that we are older, my sister and I choose to help with the entire process.
We always start by setting out all of the ingredients and separate them by crust, filling, and toppings. We also get the bowls, spoons, and measuring cups on the table.
We move through the recipe, crushing up the rich chocolate wafers for the crust, adding the warm mixture to the pie pan, cooling the crust, melting the chocolate, adding the delicious filling to the crust, whipping up the fluffy cream, and garnishing with crisp, yet fresh chocolate flakes.
After all of our efforts, a dishwasher full of dirty utensils, and eight plus hours of waiting, we get to enjoy the decadent pie.
The crunchy, buttery crust meets the rich filling in a perfect blend. The nutmeg from the crust adds a bit of flavor variation, and the cool cream adds a lightening effect to the bite. The garnish adds an extra element of crunch to it all.
Overall, the pie signifies so much more than my favorite holiday dessert. It’s time I get to spend with my family, not only when we are making the pie but also in celebration of my dad.
It does take some effort to make, but it’s well worth it and could become a tradition for others as well.
So, from my house to your home, enjoy my family’s Christmas-Birthday Chocolate Cream Pie.
Ingredients for Crust*
28 Nabisco Famous Chocolate Wafers, finely crushed
¼ tsp nutmeg
⅓ cup brown sugar
4 tbsp unsalted butter, melted
Ingredients for Filling
⅔ cup sugar
¼ cup cornstarch
½ tsp salt
4 large egg yolks
3 cups half and half
5 oz Baker’s bittersweet chocolate
2 oz Baker’s unsweetened chocolate
5 tbsp unsalted butter
1 tsp vanilla extract
Ingredients for Topping
1 cup chilled heavy cream
1 tbsp powdered sugar
¼ tsp vanilla extract
1 oz bittersweet chocolate, grated or curled, for garnish
Instructions for Crust*
Preheat oven to 375°F
Combine chocolate wafers, sugar, nutmeg, and, and melted butter in the bowl of a food processor, and pulse until the cookies are finely crushed and the ingredients are combined
Press the mixture firmly into a 9” pie pan (spread some of the crumbs up the side first, making the crust just shy of ¼” thick, then press the remaining crumbs on the bottom).
Bake for 10 minutes, until crisp.
Let crust cool while you prepare the filling
*You can sub the chocolate crust for pre-prepared regular crusts
Instructions for Filling
In a double boiler, over medium-high heat, add 3 tbsp butter and the two types of chocolate, broken into pieces.
As butter and chocolate begin to melt, turn down the heat to medium and stir chocolate and butter mixture until all of the chocolate is melted and you have a smooth chocolate paste. This assures that the chocolate will not burn.
In a bowl, whisk together the half-and-half and egg yolks.
Combine the sugar, cornstarch, and salt, and add the cream and egg mixture. Whisk gently until combined.
Add the mixture to the double broiler in a slow, steady stream, whisking until the mixture is smooth.
Cook over medium heat, whisking frequently, until the mixture starts to thicken, around 6-8 minutes.
Immediately turn the heat down to summer and cook, whisking constantly, especially around the edges, for one more minute until the mixture is thick and coats a wooden spoon (The constant stirring and low heat prevents the eggs from scrambling). Be sure to scrape the whisk against the bottom and edges of the pan where the mixture is more likely to overheat.
Remove from the heat and immediately add 2 tbsp butter and vanilla extract; whisk until evenly combined.
Pour the filling into the cooled crust and smooth the top.
Press a piece of saran wrap directly over the surface of the filling to prevent a film from forming.
Chill in the refrigerator for at least 8 hours or overnight.
Instructions for Topping
Close to 3 hours before serving, place the heavy cream in a chilled mixing bowl.
Using an electric mixer, whip on medium-low speed until the whisk or beaters begin to leave tracks in the cream.
Add the sugar and vanilla extract and whip until the cream holds medium silky peaks. Go slowly towards the end; the cream will get grainy or curdled if you go too far.
Once whipped, spread the whipped cream over the filling.
Garnish with grated chocolate and refrigerate until ready to serve.
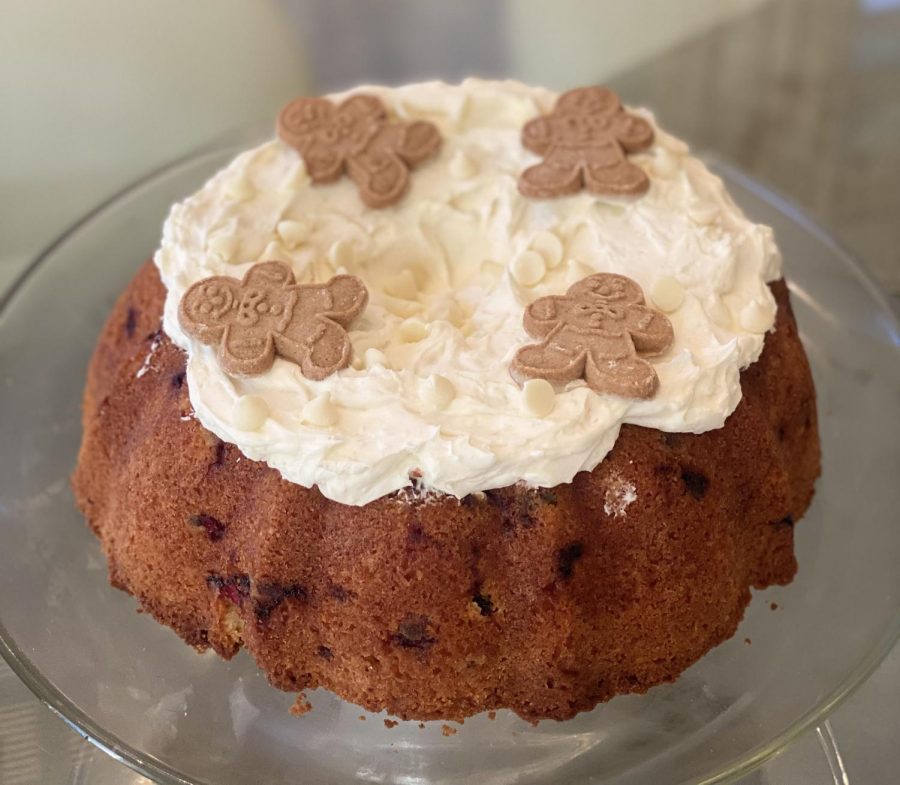
Gingerbread men garnish an orange cranberry bundt cake. The cake looked simple but contained a complex mix of flavors topped with smooth buttercream.
Jacksons’ Orange Cranberry Bundt Cake With White Chocolate Frosting
The holidays have always been a big deal in my family.
We go all out every year. From decorations to presents to the food, the holidays are always a time I look forward to.
Specifically, I always look forward to the special bundt cake that my family bakes every year. The cake is an orange and cranberry bundt cake with white chocolate frosting.
According to my dad, we started baking it after my mom found the recipe in a Homegoods magazine. My mom saw the recipe and thought it looked so good that she was going to take it upon herself to bake.
At the time, my mom offering to bake something was uncommon. My mom has never enjoyed being in the kitchen and typically avoids all kitchen work entirely. However, that year, she pulled it off, and what she took out of the oven would go on to become a Jackson household favorite.
As the years have gone on, the role of baking the bundt cake has been passed on to me. So for the past four years, I have spent at least three hours in the kitchen baking the bundt cake.
The cake is simple in its nature: a bundt cake covered in frosting. However, what makes this cake truly amazing is the complexity of the flavors.
Tart cranberries combine with a light vanilla batter. The batter is velvety and airy with splashes of vanilla and almond. The flavors are then enhanced with a mixture of brown sugar and white sugar, which works perfectly with the vanilla and almond extracts.
The batter is also sprinkled with ripe cranberries and orange zest. The cranberries work to balance the sweetness of the cake while the orange is added to brighten the cake up.
The final element to this cake is the blanket of white chocolate buttercream on top. The butter cream is thick and rich. It elevates the cake from a simple tea cake to a dessert.
My family has mixed it up throughout the years, substituting the buttercream for a glaze instead, which is made by combining orange zest, melted white chocolate, and a little heavy whipping cream.
Regardless of which method you choose to ice it, this cake makes for a great holiday cake that will surely impress anyone at a holiday gathering.
Cake Ingredients
2 1/4 cups all-purpose flour
1 teaspoon baking powder
1/2 teaspoon salt
1 1/2 cups unsalted butter, at room temperature
3/4 cup full-fat cream cheese, at room temperature
2 cups granulated sugar
1/4 cup light brown sugar, packed
1 tablespoon finely grated orange zest
1 and 1/2 teaspoons vanilla extract
1 teaspoon almond extract
5 large eggs, at room temperature
2 cups fresh cranberries
3 tablespoons all-purpose flour
White Chocolate Buttercream Frosting Ingredients
1 cup unsalted butter, at room temperature
2 1/2 cups confectioners’ sugar
1/4 teaspoon salt
2 tablespoons heavy cream
1 teaspoon almond extract
6 ounces quality white chocolate, melted and cooled for 10 minutes
Instructions
Preheat the oven to 325F. Generously grease a 10-inch, 12-cup bundt pan, being sure to coat all of the nooks and crannies. To grease, rub butter all around then sprinkle flour to coat the entire pan.
In a medium mixing bowl, whisk together the flour, baking powder and salt, then set aside.
In the bowl of a stand mixer with the paddle attachment, beat the butter and cream cheese at medium speed until smooth and creamy, about 1 minute. Slowly add in both the white and brown sugar, then increase the speed to medium-high and continue beating until light and fluffy, about 3 minutes.
Beat in the orange zest, baking vanilla and almond extract. Reduce the speed back to medium.
Add in the eggs one at a time, beating well after each addition and scraping down the sides of the bowl as needed. Reduce the speed to low and add in the flour mixture, mixing just until combined.
In a medium mixing bowl, combine the cranberries and flour and toss well to coat. Then fold the cranberries into batter until just combined.
Scrape the batter into the prepared pan.
Bake for 70 to 75 minutes, or until the cake is golden and a toothpick inserted into the center of the cake comes out clean. Allow the cake to cool in the pan and set on a wire rack for 20 minutes.
Flip onto the rack and let it cool completely.
While the cake is cooling, make the frosting. In the bowl of a stand mixer fitted with the paddle attachment, or in a large bowl using a handheld electric mixer, beat the butter on medium-speed until completely smooth.
Reduce the speed to low and gradually add in the confectioners’ sugar, beating until all of the sugar is completely combined.
Add in the salt, cream, and almond extract and beat smooth.
Add in the white chocolate and beat smooth. Once all of the ingredients have been incorporated, increase the speed to medium-high and beat for a minute.
Spread frosting on the top and sides of the cooled cake. Top with slivered almonds and orange zest if desired. Slice and serve, or store in an airtight container in the fridge, for up to 5 days.

Soft marshmallows sprawl across a slice of mashed sweet potato casserole. The sweetness of the marshmallows combined with the caramelized sweet potato to make a dessert that will satisfy any sweet tooth.
Sam’s Mashed Sweet Potato Casserole
The crumple of the amber leaves is a sound familiar to me during the holiday season.
I peddle over them on my rusted bike with my friends behind me on our journey to the local grocery store. We would throw our bikes at the side of the store, and rush in right before the five minute closing announcement filled the building.
Splitting up, we all took different aisles and snatched all the ingredients up for our mashed sweet potato casserole before the staff had to escort us out.
We hurried back to my house, bags dangling on the handles, with the occasional stop if someone crashed from the uneven swerving bike.
Once we arrived home, we would all take our roles, with nobody getting to sit back and watch. Someone would set up the wooden table, pulling the coffee-stained plaid tablecloth over the table and setting five sets of mix-and-match utensils across the table.
Then in the kitchen, we would put on our old hand-me-down aprons and get to cooking. Someone would start the oven’s preheat and pull out grandma’s deep teal-green mixer.
We mixed the potatoes until mashed and poured all the rest of the ingredients, slowly making the base for the casserole. We coated the pan evenly with a thick layer. After putting the casserole into the oven, the room was filled with the sweet aroma of fresh caramelized sweet potato.
The taste was only something that can be described in memories.
Memories of me and my friends going down to the neighborhood coffee shop to quench the thirst for something sweet after a long day of school, or the memories of FaceTimes with my friends until midnight where we planned to study but laid our books aside to enjoy each other’s company.
These memories were perfectly complemented by the taste of the fluffy, slightly melted marshmallows that reminded me of my time at camp.
The casserole still had the classic timeless taste of sweet potatoes but with a twist with the undertones of brown sugar and vanilla coming through in the bites.
Next time you need to bring something to a holiday party, bring a sweet potato casserole to celebrate the future, appreciate the present, and reminisce about time with your friends that will stick with you to the end.
Ingredients
5 cups of mashed sweet potatoes
3/4 cup of brown sugar
1/2 stick of butter
1/2 cup of milk
1 tablespoons of vanilla extract
1 teaspoon of salt
2 cups of marshmallow
Instructions
Preheat the oven to 375F.
Mash the sweet potatoes then add all ingredients together.
Place in a greased 9-by-13 inch rectangular pan.
Top with marshmallows and pop it in the oven. Cook it for 30 minutes.
Pull it out then let cool for 10 minutes.
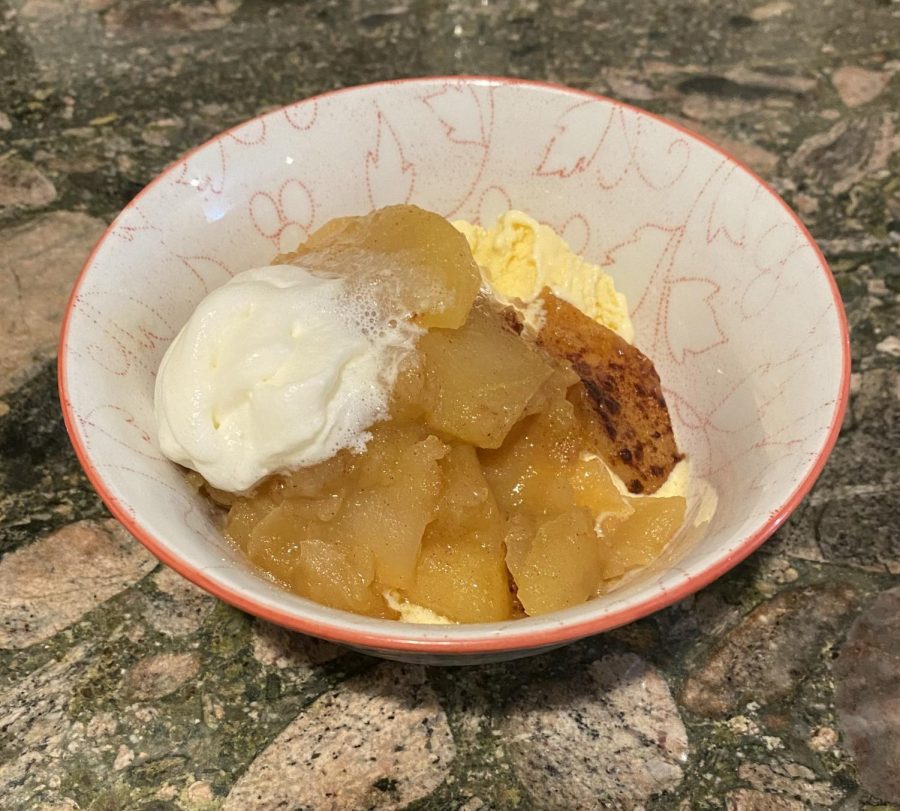
These baked apple slices are freshly baked and topped with cinnamon. The dessert was tart and paired deliciously with a scoop of vanilla ice-cream and a dash of whipped cream.
Carliles’ Baked Apple Slices
At the end of the year, my family does a few special things to celebrate the holidays.
My family doesn’t have many traditional recipes, especially during the holidays, however we sometimes like to experiment with different foods that everyone can enjoy.
The dessert category is particularly popular with my family, considering the fact that a few of us have a major weakness for sweets, me especially, yet we always find it easier to just buy a dessert from the store rather than making something ourselves.
This year, in an attempt to make something different than usual, my mom and I decided to try making a dessert that we haven’t tried before. The dessert is very simple, baked apple slices.
I didn’t let the dish’s simplicity fool me because despite how basic it sounded, the dessert made for a delicious holiday food that my entire family has enjoyed.
There are only a few simple steps needed to be able to successfully recreate these baked apple slices.
First, the most important ingredient, the apples. I thought that about four or five apples would be enough for a serving for my family of five, however I was proven wildy incorrect as soon as the apples came out of the oven.
After the apples are baked, they have a tendency to shrink down, and it seems like there are a lot less apples than there were to begin with. Because of this, I advise to buy a few more apples than you think necessary to begin preparation for this dessert.
I think that the apples are best served piled on top of a bowl of vanilla ice cream. However, they can be enjoyed in any way.
In total, it only took my mom and I about an hour to complete making this dessert, and it was then quickly devoured and polished off by the entire household. Even my cats sniffed the dessert with curiosity.
When my mom pulled the apples out of the oven, I was blown away by how good they smelled. The entire kitchen smelled like cinnamon, and it was perfect for creating a holiday atmosphere.
I quickly grabbed a bowl and scooped some vanilla ice cream into it then added the apples, excited to try the dessert fresh out of the oven. When I took the first bite, it was even better than I imagined. The combination of the flavorful warm apple slices, and the cool sweet vanilla ice cream was ridiculously good. I had to steal a little more of just the apple slices immediately afterwards.
The apple slices were tart and melted in my mouth, and the flavorful spices created a warm comforting feeling.
The dish is pretty similar to the filling in an apple pie but even more flavorful, especially when the baked apples are fresh out of the oven.
After I helped myself to more of the apple slices, the rest of my family finished off the dish, and we agreed to make it again soon before the holidays were over.
The simple ingredient of apples was able to create such a delicious dessert, and now we can easily make a holiday recipe with just a few short steps and a little time.
Ingredients
3/4 cup of sugar
1 tablespoon of flour
1 tablespoon of ground cinnamon
1/4 teaspoon of ground nutmeg
1/4 a cup of butter
3 apples, sliced
Handful of walnuts, optional
Handful of raisins, optional
Instructions
Preheat the oven to 350F
Put the sliced apples into a baking dish.
In a separate bowl, mix together all of the other ingredients, then pour the mixture over the apple slices.
Add a few small squares of butter to the top of the baking dish, and sprinkle on more spices if needed.
Bake apples, uncovered, for about 45 minutes to an hour.
My mom has been making this delicious cranberry pie for as long as I can remember. The recipe is simple and produces a mouthwatering dessert.
Nanny Ellis’s Cranberry Pie
My cinnamon colored skin, coffee colored hair and dark eyes are not quintessentially Massachusetts, but my pride in my family’s long history on the East Coast runs deep.
Summers spent visiting my grandfather in Cape Cod as my sister and I raced down sandbanks and plunged into the chilling water of the Atlantic are at the forefront of my memory, along with ferry rides, cool breezes at night and the cry of seagulls. Just as prominent are recollections of indulging in the coastal state’s signature foods. And there’s nothing like recreating the memories of a perfect trip in the cold of winter thanks to a folder of recipes.
One of those recipes is synonymous with my family’s New England roots. Affectionately titled “Nanny’s cranberry pie” by my family in honor of my great great grandmother who would make a similar pie, this classic holiday dessert has always been the centerpiece of family Christmas dinners. While the ever-popular pumpkin and pecan pie are present for the occasion as well, I always find myself cutting a generous slice of the cranberry pie first.
My family owned a cranberry bog in Marshfield, Massachusetts, and when she was still alive, my great great grandmother would make a cranberry pie from her own recipe. Decades later, my mom found a very similar albeit simpler recipe. The pie has since become one of the things I look forward to most about the holidays.
For me, the perfect balance of tartness and sweetness in the cranberries is what makes this pie unlike any other. The explosion of the smooth, subtly sugared taste of the filling in my mouth is any cranberry lover’s dream. I’m a cranberry enthusiast myself, so much so that I once joked to my dad that cranberry sauce runs through my veins, so this dessert never fails to put me in a good mood.
Additionally, the light crumble on top practically melts in your mouth as you take the first bite and doesn’t have the doughy, overly flaky crust common in pies. Its delicate flavor pairs perfectly with the cranberry filling and leaves a satisfying feeling in your mouth.
The perfect complement to this dessert is a dollop of whipped cream or vanilla ice cream when served warm. The airy texture of the whipped cream pairs nicely with the confiture-like consistency of the cranberry filling and creates the sensation of walking on air. The vanilla flavor of both the whipped cream and ice cream enhances the flavor of the pie even more by creating contrast between its gentle, light taste and the sharpness of the cranberries.
Each time my mom has made the pie she’s followed the recipe exactly as it is written, but when we made it recently, she changed things up a little by adding some brown sugar and cinnamon for stronger flavor. Adding spices such as cinnamon or nutmeg helps to intensify and add variation to the taste.
Even though it’s now been a few years since I last ran down that beach in Cape Cod, the memories have not wavered. Making this pie not only makes me feel more connected to my family’s heritage, but it also gives me a sense of comfort and tranquility. My hope is that anyone who makes this pie will feel a little bit of the East Coast brought to their table this holiday season.
Ingredients
1 cup all-purpose flour
1 cup white sugar
1/4 teaspoon salt
2 cups cranberries
1/2 chopped walnuts
1/2 cup butter, melted
2 eggs
1 teaspoon almond extract
Instructions
Preheat the oven to 350F. Grease one nine inch pie pan.
Combine the flour, sugar and salt. Stir in the cranberries and walnuts and toss to coat.
Stir in the butter, beaten eggs and almond extract. If you are using frozen cranberries, the mixture will be very thick.
Spread the batter into the prepared pan.
Bake at 350F for 40 minutes or until a wooden pick inserted near the center comes out clean.
Serve warm with whipped cream or ice cream.
Source: Allrecipes
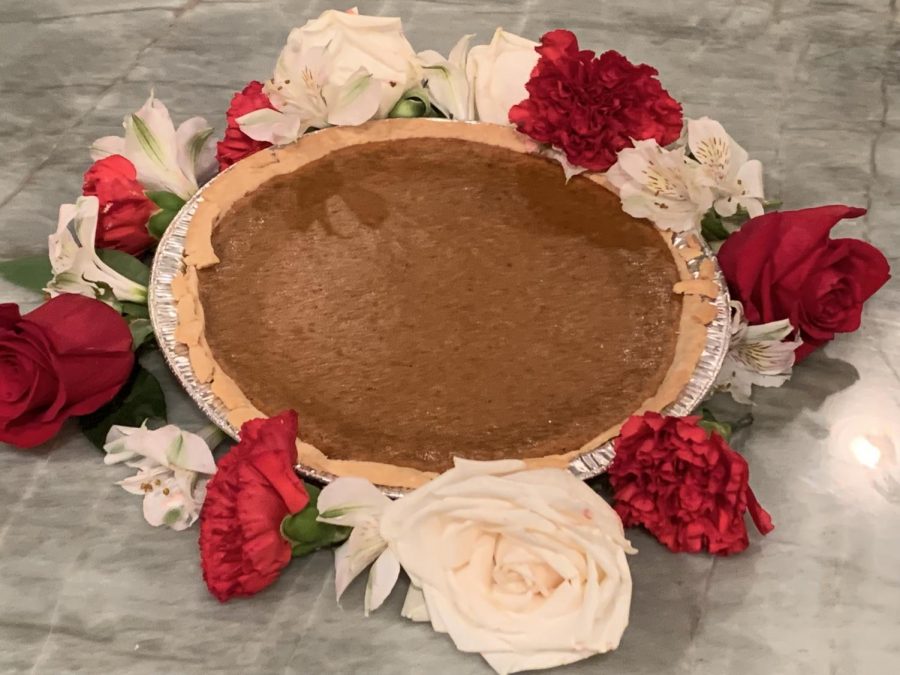
Roses line the tin holding a fresh pumpkin pie. The pie had a lush, buttery crust and a smooth filling.
Addleman Pumpkin Pie
Every year when winter and fall rolls around, the only dessert I crave is my family’s pumpkin pie.
Whether it is on the slightly windy nights of Halloween, the cool fall weather of Thanksgiving, or the cold winter breeze of Christmas, I know that I can always count on this homemade pumpkin pie to keep me satisfied. It has the warm spices of cinnamon and cloves that aren’t overpowering. A fresh pumpkin pie baking in the oven fills the house with the smells of the holidays.
You can enjoy this pie with your family for a special occasion or just for a weeknight dinner. It is a simple recipe that is quick to get in the oven.
I prefer a flaky pie crust either from the grocery store or a simple recipe from any cookbook. Just make sure it is made with lots of butter, as the butter makes the pie rich and luxurious. The crust can also be made as a graham cracker crust combining crushed graham crackers with melted butter and a little sugar. It is messier to serve with a graham cracker crust but the fall flavors are enriched by the butter and honey combination in a graham cracker crust.
On the dessert table, a pumpkin pie may look a little plain compared to the lattice apple or cherry pie or the fluffy white meringue or cream pies. If you want to engage in a beauty contest, the pumpkin pie can be decorated with sugared fruits or nuts, but I don’t find it necessary. It stands on its own when cut and eaten.
This pumpkin pie cuts beautifully showing the texture and structure of the pumpkin custard within. Use your fork to take a small bit at first to enjoy an initial flood of all the spices. The texture is smooth and silky so I work hard to keep the pie custard in my mouth for a few minutes to enjoy. But, despite my best efforts, after the first bite or two, my fork takes bigger and bigger chunks to fill my mouth and satisfy my craving.
The directions note that you should cool the pie before eating, but I like to eat it while still warm so I frequently eat a slice right out of the oven. If you do too, be careful not to burn your tongue!
Serve the pie in wedges with each wedge topped with whipped cream or dessert topping. It is also good with drizzled honey and ice cream. Note that if you like nuts and aren’t already having a pecan pie with your holiday dinner, chopped pecans or walnuts can be added to the custard and sugared nuts can be sprinkled on top of the whipped cream or ice cream.
Ingredients
Unbaked 9 inch pie shell
1 cup granulated sugar
1/2 teaspoon of salt
1 1/2 teaspoon of cinnamon
1/2 teaspoon of ground ginger
1/2 teaspoon nutmeg
1/2 teaspoon of allspice
1/2 teaspoon of ground cloves
1 1/2 cups of canned pumpkin
1 2/3 cups of evaporated milk, undiluted
2 eggs, well beaten
Instructions
If using a homemade flaky pie crust, refrigerate the pie shell for several hours. I like to “par-bake” or prebake the shell empty for about 10 minutes at 400F so that when the custard mixture is put in the middle, the crust doesn’t get overly soggy. Then start heating the oven to 425F.
Combine the sugar, salt, and other spices. A secret addition that isn’t in the official recipe is to add a dash of salt and a dash of pepper. To the dry mixture, add the pumpkin, milk, and eggs and then beat until smooth.
The creamy dark sandy-colored mixture looks enticing but don’t bother tasting it. It will pale in comparison to the genuine baked pie! Pour the mixture into the shell about 3/4 full. You may have some extra mixture as I frequently do so you can pour that into a small, slightly greased, or buttered casserole dish for a separate pumpkin custard.
Bake at 425F for 15 minutes and then reduce the heat to 350F for 35 minutes or until the custard is set. The middle should jiggle or wobble a little bit but not appear as if it would pour out of the shell if tippe. But, be careful not to overcook it as it will dry out and the custard will crack on top.
When the pie first comes out of the oven, it typically has a puffed-up appearance to the custard. That will lie flat fairly soon after it comes out of the heat.
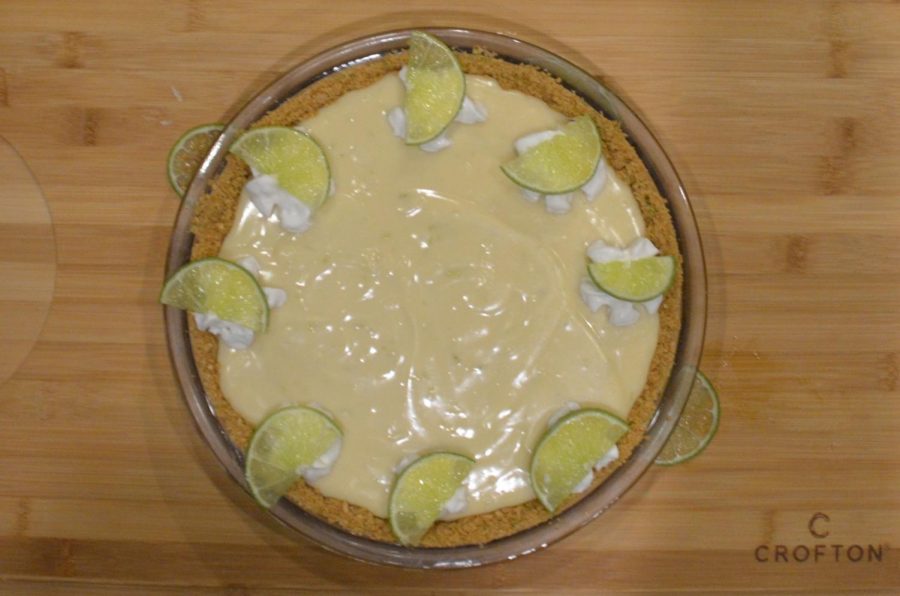
Sliced limes rest on top of dollops of whipped cream on the Key lime pie. The pie’s filling was creamy and tart.
Juliana’s Key Lime Pie
Key lime pie is a seasonless staple, being carried through stores at all times of the year.
It’s a wonderful, tart yet sweet and creamy American essential.
I am by no means a pie connoisseur, more of an enjoyer. I usually prefer to watch in awe at the baking skills they require, but Key lime pie is shockingly easier than I expected.
This pie is a delicious delight, with only basic household ingredients needed. Recipes usually include lime juice, condensed milk, and lime zest, but sometimes people use raw egg yolks instead of the sour cream in this recipe.
The first part of a good pie is the crust. Crust is crucial to all baking that includes it. It’s the most flavorful part of a bread, and it can be the make or break of a pie. This Key lime pie uses a basic recipe for a graham cracker crust, plus one lime for zesting. The crust ended up being flaky and wasn’t as solid as I had hoped, but that was on me, as I didn’t get it as condensed as it should be.
Though I failed to make it as solid as possible, I knew the crust was essential to get all of the tartness that comes in a good pie. I zested about a whole lime into it, which could be overkill, but I say zest as you please, and eyeball it for yourself.
As soon as you mix the dry ingredients for the crust, I recommend smelling it. It serves no legitimate baking purpose, but lime zest and graham crackers smell very good together.
Next comes the filling. I found that starting with the thicker liquids first made it easier to mix. After putting the filling in the crust, it’s time for the pie to go in the oven.
I was surprised by the amount of people in recipe comment sections talking about how it’s criminal to heat Key lime pie in the oven. It went against some Floridian pie code apparently, but I was more keen on following my recipe than living by a pie code.
After letting your pan cool down, let the pie sit for at least 3 hours in the refrigerator, and then feel free to dig in.
I adored this pie. It was creamy, with a crumbly yet delicious crust. It tasted very tart, which I love, but some others don’t. Again, zest at your own risk. I don’t claim to be a Key lime pie connoisseur, but this has been some of the best pie I’ve ever had. If I had to rate it, it would be a solid 4.5/5, with 0.5 subtracted for my own crust mistake.
With a recipe that’s so easy to love and made with basic household ingredients, Key lime pie will be a returning recipe in my family.
Crust Ingredients
1 lime
1/4 cup unsalted butter
250g of graham crackers
Key Lime Pie Filling Ingredients
1/2 cup sour cream
3/4 cup lime juice
2 cups condensed milk + a little more
1 lime
Instructions
Preheat the oven to 350F.
To make the crust, grind up your graham crackers using a food processor.
Stir in however much lime zest you think is right. I used a whole lime, because I prefer a more tart pie.
Melt your butter. Using a spatula, stir butter into the dry ingredients, making a crust that will be relatively solid if you press down hard enough.
Take your pie crust and use a flat surface to flatten down your crust at the bottom and around the sides. I used the bottom of a measuring cup. This crust does not need to be preheated.
To form the filling, mix your sour cream, lime juice and condensed milk together in a separate bowl.
Zest in however much lime zest you would like.
Pour into the crust, and put into the oven for 5 minutes.
Refrigerate for 3 hours before serving. It can also be left overnight, which I did because I knew I wouldn’t be eating Key lime pie at one in the morning.
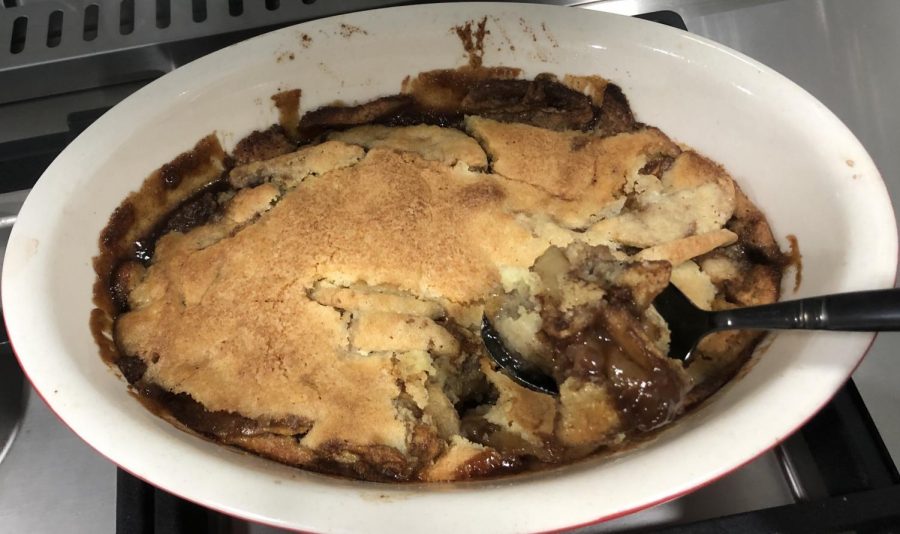
A spoon displays the soft, sweet filling inside the apple cobbler. The warm dessert was addictive, and seconds were hard to resist.
Watkins Family Apple Cobbler
Our family tradition, since way back to when I was too young to remember, is to bake in the winter.
Our favorite thing to bake by far is our apple cobbler. Nothing is better than a warm dessert on a cold night with your family. Even waking up from a nap and smelling the familiar scent of apple cobbler sets the perfect mood for the season. Our family all agrees that our little traditions are important but this is the one that we look forward to the most.
Every year around christmas we make our apple cobbler. We all enjoy helping out making the dish. I remember when we were younger, my and my brother’s favorite thing was to “taste test” the ingredients before they were put in to be mixed. I think what excited me the most as a child was the fact that we could turn apples into something so delicious.
The warm apple inside steals the love of everyone’s taste buds after their first bite. The cinnamon flavors dance with the apple flavors in the most satisfying way in your mouth. You can’t help but let out a “mmm” as all the flavors come together in some sort of congo line. The ingredients melting on your tongue always leaves you craving for another bite. You tend to get caught up in the “just one more bite” and before you know it, you’re unbuttoning your jeans for more room so come prepared!
Hand making the cobbler always plays a significant role in getting that authentic taste. Personally putting all the ingredients together gives you the opportunity to perfect something as beautiful as apple cobbler, knowing the recipe ensures that no flavor overpowers another flavor too violently. It’s important that each flavor balances out perfectly because that’s what makes the whole thing amazing.
Personally, my favorite part is the crust. The buttery outer shell never fails to impress. The difference between pie crust and cobbler crust is very noticeable. Pies have a hard and flaky crust that falls apart. My family simply doesn’t enjoy that, so we usually just throw it away. Cobbler crusts are always soft and fluffy and welcoming to the mouth. The fluffiness is what gets me hooked. It’s like cake and pie mixed but even better. It’s to die for. There’s never a bite left on the plate after getting a piece of cobbler.
Cobbler Ingredients
Butter, or nonstick spray for pan
2 1/2 cups of sliced apples
3/4 cup brown sugar
2 tablespoons of all purpose flour
1 teaspoon of vanilla extract
1/2 teaspoon of ground allspice
1/4 teaspoon of table salt
4 tablespoons of softened butter, separated into two
Topping Ingredients
1/2 cup of self rising flour
1/2 cup of sugar
1/4 teaspoon of salt
1 egg, beaten
2 tablespoons of unsalted butter
Instructions
Preheat the oven to 450F. Butter or spray a 9-by-9 inch baking dish.
Put all of your cobbler ingredients, excluding two of your tablespoons of butter, together in a bowl and mix well. Once finished, place the mixture in the baking dish and then dot with the rest of the butter.
In another bowl combine our ingredients for the topping. With a spoon, spread the second mixture on top of the first mixture and pat it down.
Bake until the crust is golden and the fruit is soft for 40-45 mins.
Serve. It’s best with ice cream on the top.
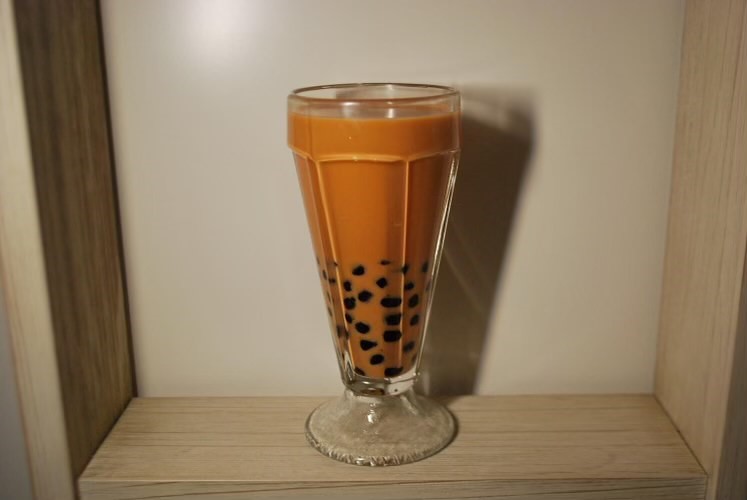
Freshly mixed Thai eggnog boba tea awaits for someone to take a sip and relax on their holiday. The drink originated from a successful experimentation with combining different drinks in the fridge.
Alex’s Creamy Thai Eggnog Boba Tea
From late night tiptoe excursions to the kitchen at sleepovers, to a crisp sunrise christmas brunch with your friends, pouring a glass of chilled Thai eggnog boba is always the move.
Thai tea, eggnog, condensed milk and boba make up this drink. It is a combination of two classically Asian elements and the traditional American holiday day drink of eggnog, making it a fusion of cultures with a seasonal twist.
Boba are tapioca pearls, commonly placed in milky tea, which originated in Taiwan. Boba and Thai tea are some Asian delicacies that have been often frequented by my friends and I to sip on while hanging out, drawn to them because of their unique individual taste and their compatibility with other foods.
This drink came from a spontaneous night with friends and a barren fridge with minimal ingredients. We laid out all the ingredients we could find for a drink and started mixing them all together, pouring eggnog, Thai tea, condensed milk, and boba into a glass. And thus, the Thai tea eggnog
boba was born.
With the first sip, your taste buds are hit with the tropical taste of Thailand, complemented with the thick creaminess of eggnog. And as the end of your drinking experience nears, you get the satisfying feeling of biting down on soft, gummy boba balls.
With a glass filled to the brim with cold fresh thai tea and boba piled at the bottom of the glass, this drink is gorgeous, and perfect for Instagram or Pinterest.
Now every time my friends and I spend late nights together, no matter what we are doing, we are always accompanied by our iced Thai tea eggnog boba.
The next time you’re thirsty after a family feast, indulge in this delight on top of your long day spent with your closest friends and family.
Ingredients
4 Thai tea bags
32 fluid ounces of water
1 cup of boba
3 fluid ounces of eggnog, or as much as you prefer
1 cup of condensed milk
1 cup of ice
Instructions
Boil water and Thai tea bags in a pan.
Chill the tea in a pitcher.
Once chilled add the eggnog, condensed milk and boba.
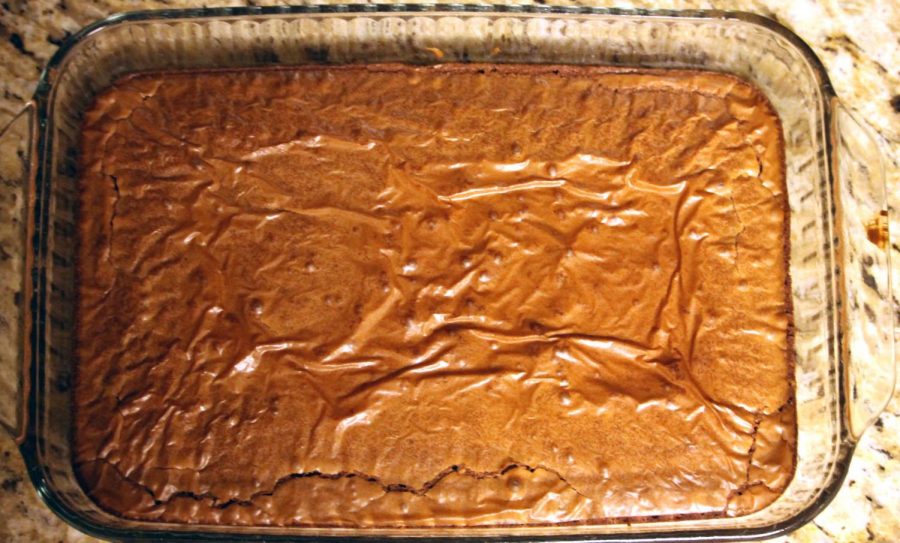
The cinnamon brownies when cooked to a golden color. The addition of cinnamon is what separates these from the usual chocolate brownies.
Cooper’s Cinnamon Brownies
Holidays are a time to spend with family and friends, but they’re also a time to cook family recipes as well.
A recipe that’s been in my family for generations is cinnamon brownies from scratch. The person who created this simple recipe was my great grandmother Jimmy Clark.
She always believed that anything made from a box with mix-in ingredients was way too easy and that they didn’t have love baked into them, something my great grandmother wanted to include in everything she made.
For that reason she made these brownies from scratch every year during the Christmas season. Back in 1982, when my great grandmother was a young woman, she was hosting her very first Christmas Eve party.
She had no idea what dish to make, so she settled for a simple and easy recipe she made up.
She’s made brownies many times before, but basic brownies weren’t what she wanted, especially for Christmas.
While she was baking she experimented with different kinds of ingredients such as, nutmeg, sweet paprika and mint, but she ultimately settled for cinnamon.
The cinnamon captured the holiday season and blended beautifully with the chocolaty brownies.
Since this recipe is very simple to make, she made these brownies every single year for Christmas Eve from when she was a young woman all the way up until she was an elderly woman.
This recipe is easy to duplicate and is also relatively easy to serve. It’s also a good holiday food to take to parties since it’s easy to share with others.
The taste of these brownies is sweet with a hint of bitterness from the semi-sweet chocolate inside of them and the taste sticks to your tongue and leaves you with a long-lasting flavor. They have almost a nostalgic taste to them that makes you feel at home.
The presentation is rather mundane, but my great-grandmother’s presentation wasn’t meant to be astute. What mattered most to her was the flavor.
The brownies are also best when warm and served with chilled vanilla ice cream. Together, all the flavors melt in your mouth. With every bite of these brownies you’re left with wanting more, so much so, you basically end up eating the whole tray if you’re not careful.
Overall, these brownies are embedded into my family’s history for and will be made for generations to come.
While my great grandmother passed away, her memory will never be forgotten. I passed along the tradition of making her brownies every year for my family’s Christmas Eve party. Every time I make them, I think of her.
Ingredients
½ cups flour
2 tsp. baking soda
1 tsp. salt
1 cup sugar
⅓ cup brown sugar
2 tsp. vanilla
2 eggs
¼ cup cocoa powder
¼ cup of butter
1 cup chopped chocolate
2 tsp. cinnamon
Instructions
Preheat oven to 350℉
Grease glass pan with butter
Chop chocolate and put into pan with butter, melt together (set aside)
In a separate bowl cream the butter and sugars together until fully combined
Add one egg at a time to the sugar-butter mixture, mix together until combined
Add vanilla
Add flour, salt, baking soda, cocoa powder, and cinnamon
Mix until combined
Once combined pour into greased pan
Bake 25-30 minutes or until batter is fully cooked
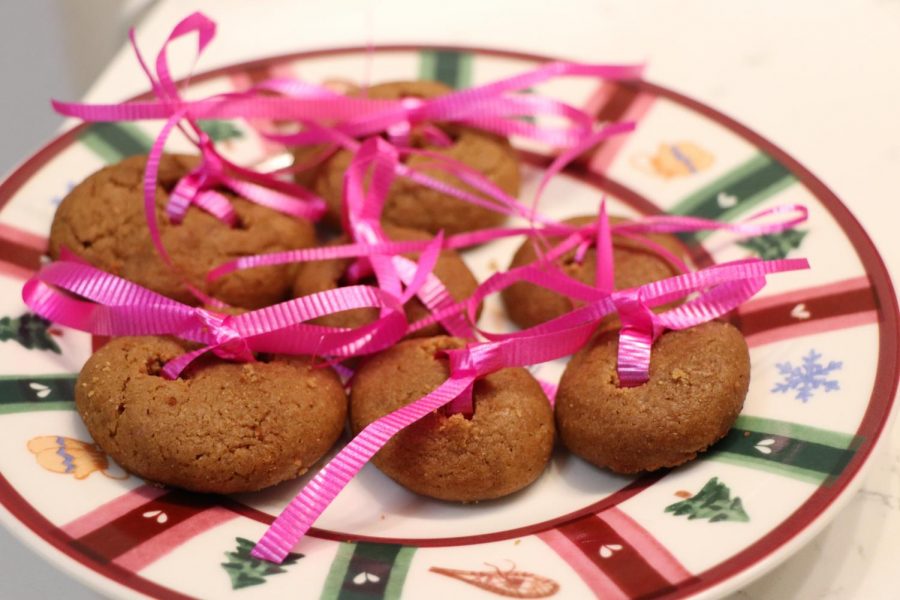
The button cookeis after they’ve been baked and decorated. The recipe has been in the Navarro family since the 1980s.
Navarro Family Button Cookies
With a taste like no other, button cookies are what makes the holiday season such a special treat for me.
My grandmother, Maria, or Grandma Maria as we call her, always wanted to have her dishes be the best out of everyone else’s. Whether it was a small appetizer or a homemade dish, she made sure to come out on top.
In 1986, my grandmother was sitting in her apartment with her first cousin, Carmen, and her husband Moses. While she paced around the living room, she looked out the window to the immense buildings and busy lifestyle of Manhattan, New York. She struggled to come up with a dessert to make for an upcoming Christmas party.
Carmen and Moses attempted to help Grandma Maria think of a festive idea, suggesting casseroles, pie and other traditional sweets, but none of the dishes seemed appealing to her.
Then it struck my grandmother that she could make the typical holiday cookies, but with a twist. Instead of using chocolate chips or sugar to add to the mixture, she decided to add ginger instead.
Though the ginger was a creative move, Grandma Maria didn’t think it was enough to outshine the other guests that were attending the party.
She glanced over to the dining room, where a stash of Christmas materials, used for presents, were placed. The pile consisted of wrapping paper, boxes, glitter and ribbons.
When she glanced at the ribbons, she turned to Carmen and said ‘I’m going to use the ribbons to tie it through the cookies and make it look like a present’.
Once the words slipped my grandmother’s mouth, joy filled inside her, knowing the dessert she was about to construct would live on for generations, and also win over the guests at the party.
The dish became a successful hit when Grandma Maria brought the cookies to the event. Since then, the delicious ginger cookie recipe was passed down to my father and uncle.
When the cold weather starts to set in and lights are hung around the tree, it marks the official time to bake the cookies. Each year I get more excited to bake them, especially with my sisters.
While mixing the rich ginger and sweet sugar into the mixing bowl, ‘All I Want For Christmas’ by Mariah Carey is the main song we play while we bake.
The light-weight dough evens out to make perfect circles and holes for the ribbons.
When the cookies are perfected after being placed in the oven, I tend to use the ribbons for decoration. Once the cookies are displayed for everyone to see, I take the ribbons out and take a bite of the ginger flavored cookie.
The cookies draw you in as you take a bite of the warmness that fills it. When you take a bite of the cookies, a soft texture dissolves in your mouth with ginger lingering. Once you eat one of the cookies, there’s no stopping from there.
The smell of ginger roams through the house as the cookies bake. Especially after the baking process, the house begins to smell like a Christmas vacation in the mountains.
Thanks to my grandmother’s creativity, these ginger button cookies are what bonds my family together.
Ingredients
1 ¾ cup flour
3 tbsp cornstarch
⅓ cup sugar
¾ cup butter
1 tsp milk
ribbons
½ cup of ginger
Instructions
Preheat the oven to 350 degrees. Add flour, cornstarch, ginger and sugar into a large bowl. Make a soft mixture.
Stir the milk using a spoon, then bring mixture together with your hands to make a dough.
Lightly flour the rolling pin, and start rolling the dough.
Use the round cutter to make the dough circular.
Make 4 holes in each cookie with a skewer. Make sure the holes are big enough to pull the ribbon through successfully.
Bake the cookies in the oven for 10-15 minutes until golden brown.
Remove cookies from the oven and let them cool for about 5 minutes. When cool enough, thread the ribbons through the holes and tie the ends to make a bow.