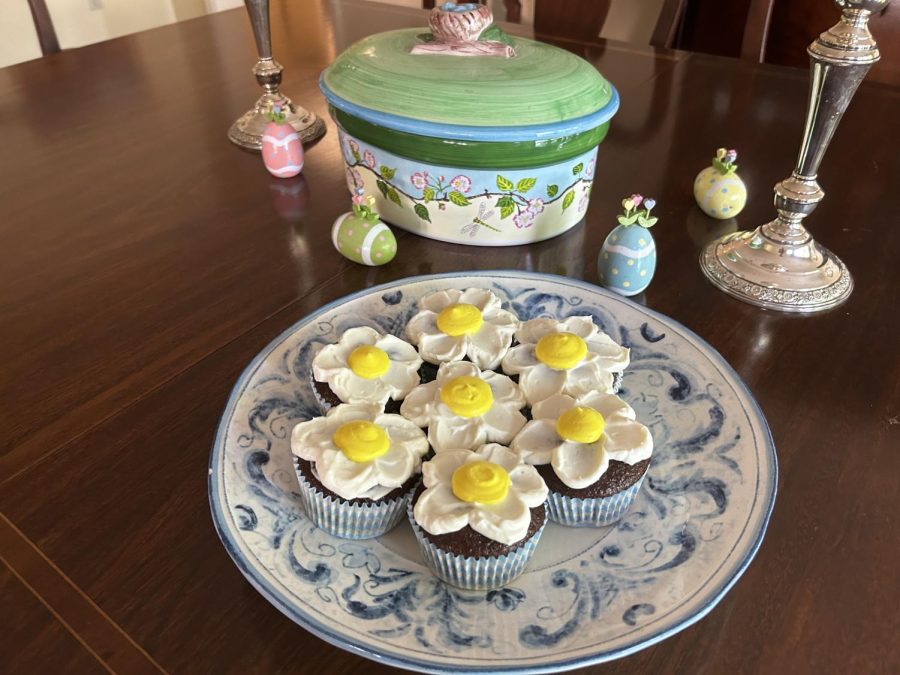
The cupcakes once they’ve been baked and decorated. They are easy to make and the perfect dessert for a spring gathering.
Celebrate Spring With These Seasonal Recipes
Homemade recipes to welcome the warmer weather
April 17, 2023
Winter is over and we’re celebrating the arrival of spring with these seasonal recipes incorporating the foods of spring like strawberries, lavender and lemon.
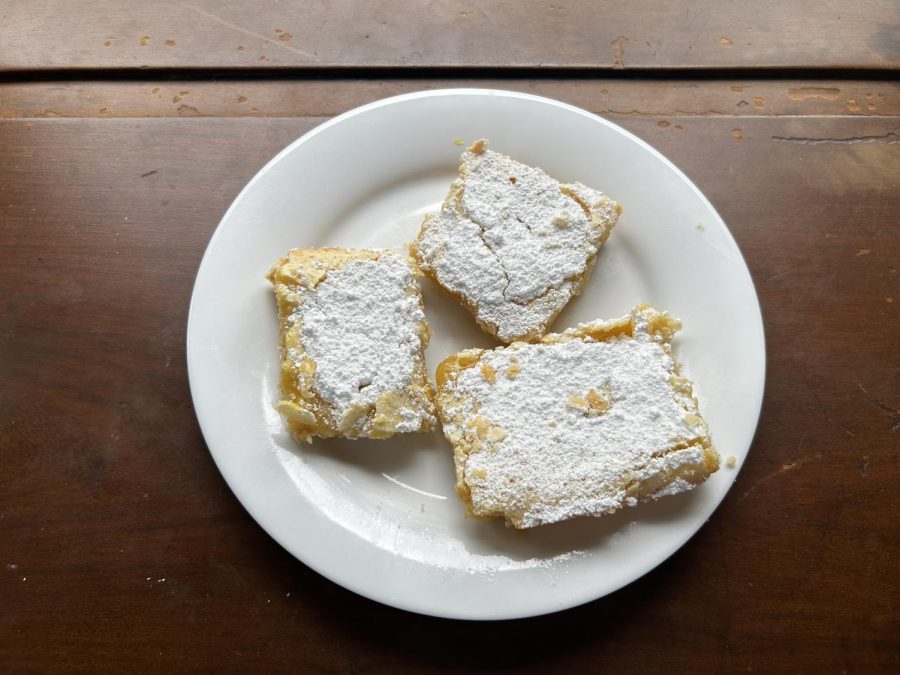
The lemon squares once they’ve been dusted with powdered sugar and are ready to be served. These desserts are delicious and simple to make.
Lemon Squares
The first time I ever had lemon bars was at a tea party I went to as a child. They had mini cucumber sandwiches and pimento cheese sandwiches and tomato mayonnaise sandwiches. It was a collection of things that no four or five-year-old would want to eat. The dessert table did not have that problem though. It was filled with lemon squares and tiny square cakes with flowers on top of them.
Though lemon-flavored foods are commonly found in the summer, most lemons are ripe in the winter and spring. So don’t let a summer drink like lemonade fool you because lemons are actually better in the mild temperatures of April.
The story behind these lemon bars comes from one year when I was in charge of making a cake and my grandmother was in charge of making the lemon squares for my uncle and brother’s joint birthday party. My grandmother, not being the best baker, managed to get the filling on the bottom and the crust on the top. The lemon squares ended up turning into lemon blobs, but they still tasted good.
So, if you are in the business of catering children’s parties or you just want to enjoy some lemon squares, then I highly recommend these. They are straightforward and delicious considering I don’t even like lemons.
For Crust:
- 1 cup softened butter
- ¼ tsp salt
- ½ cup powdered sugar
- 2 cups flour
For Filling:
- 4 eggs, beaten lightly
- 4 tbsp lemon juice
- 2 cups sugar
- Grated rind of one lemon
- 4 tbsp of flour
Instructions
- Preheat oven to 350 F
- Mix butter, salt, powdered sugar and flour in a bowl. Blend until combined and when pressed together it holds shape.
- Next, press it into the bottom of a 10-by-13 inch baking dish
- Bake the crust for 20-30 minutes or until slightly golden
- For the filling, mix the slightly beaten eggs, lemon juice, sugar, lemon rind and flour in a bowl till well combined
- Reduce the heat to 325 F and bake for an additional 20-30 minutes or until firm
- Dust the top with powdered sugar while still warm then cut when cool
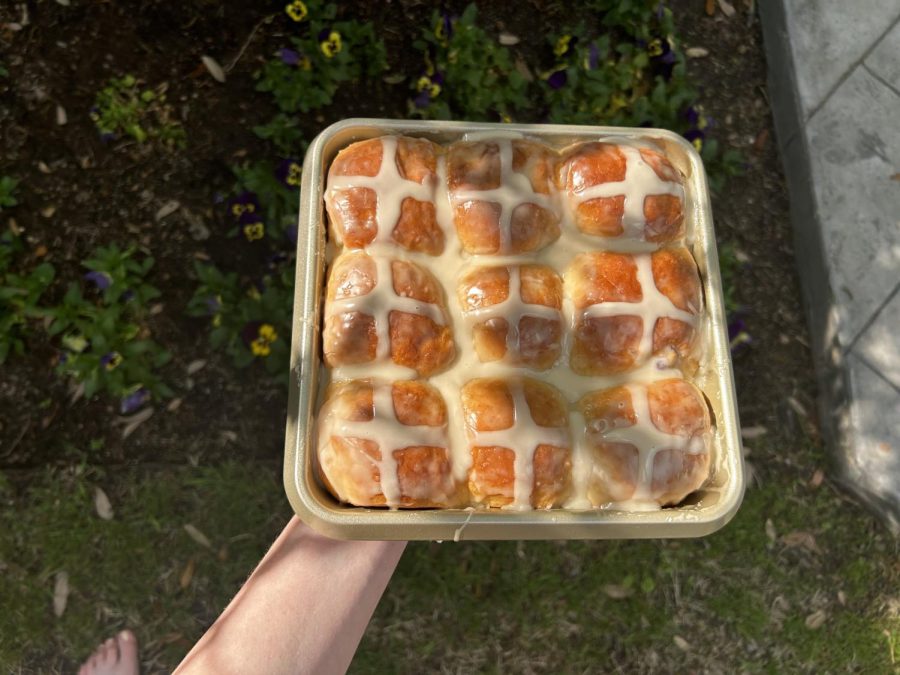
The hot cross buns when they’ve been baked to a golden color and topped with a glaze. The buns are traditionally made for Easter, but can be eaten at any time.
Hot Cross Buns
My next recipe is Hot Cross buns, an Easter staple. Don’t let that stop you, though. Hot cross buns can be served any day at any time.
The buns are characterized by the white T on the top of the bun to represent the cross or crucifix which is why Christians eat them on Easter so they can celebrate Jesus’ resurrection three days after he was crucified.
However, if you aren’t Christian, all you need to know is they are delicious and served with butter and jam.
They are a yeast roll, meaning it’s a little more complicated because you have to activate the yeast before using it. When the batter is done, you have to proof and knead the dough, so it’s no small feat to make these. It takes about four hours with proof and baking time included.
I prefer to eat them for breakfast served with coffee or fruit. They are also pretty customizable. You could add chocolate chips instead of dried fruit in the dough or maybe sprinkles if it’s someone’s birthday because the actual dough recipe without any of the add-ons is pretty basic.
As a child I liked hot cross buns, but hated the raisins that were mixed into the dough. As a result, I started to mix dried cranberries instead. In my recipe, I also add a glaze. Some make a powdered sugar paste, which makes the cross look better and more aesthetic, but it tends to taste strange which is why I make a glaze instead.
After you initially glaze the buns, I would add more powdered sugar to them so the glaze becomes thicker and makes a better cross that isn’t dripping everywhere.
Additionally, make sure you are kneading properly and rising for enough time or else you will have dry and dense buns. My grandma also says that the dough should feel like a baby’s bottom when it’s done, but, if you’re like me and don’t know what this feels like, then just wait for when the dough looks and feels smooth.
For the Dough:
- ¼ cup milk of your choice
- ¼ cup sugar
- ½ tsp salt
- 3 tbsp butter
- ¼ cup warm water
- 1 package of dry active yeast
- 1 egg, beaten
- 2 ¼ cups sifted flour
- ½ tsp cinnamon
- ¼ tsp nutmeg
- ¼ cup dried fruit of choice (currants, cherries, raisins, cranberries)
- 2 tbsp of grated orange rind (optional)
For the Glaze/ Cross:
- ¾ cups sifted powdered sugar
- 1 tbsp milk
- ½ tsp vanilla extract
Instructions:
- In a saucepan, heat milk till small bubbles form around the edges of the pan, then remove from heat. Add sugar, butter and salt, stirring constantly until the butter is melted. Let cool to room temperature.
- Take the warm water and mix in yeast in a large bowl. Mix till the yeast is dissolved and then add the milk mixture.
- Add an egg, 1 ½ cups of flour, cinnamon and nutmeg then mix with a wooden spoon until the mixture is smooth. Add the remaining flour, dried fruit and orange rind and mix till the dough is smooth and doesn’t stick to the sides of the bowl.
- Turn the dough out on a floured surface and knead until the dough is smooth and elastic.
- Place in the greased bowl and turn till the dough is fully-greased. Cover bowl with a towel and let rise in a warm place until doubled in size for an 1- 1 ½ hour
- To shape the dough, put the dough on a floured surface and roll it into a 12-inch log. Cut the roll into nine pieces.
- Take each piece and shape it into balls by tucking the edges underneath forming a smooth ball.
- Arrange the nine balls in a 9-by-9 by-1 ¾ inch pan. Flatten the balls in hand to make two-inch round balls.
- Cover the pan with a towel and then let the dough rise in a warm place for about an hour to an hour and a half.
- Preheat the oven to 375 F and bake the buns for 20 to 25 minutes.
- While baking, make the glaze. Combine powdered sugar, milk and vanilla extract in a bowl.
- Brush the warm buns with glaze and let them cool completely.
- Finally, take the remaining glaze and make a cross on the top of each bun. Serve warm.
The cupcakes once they’ve been baked and decorated. They are easy to make and the perfect dessert for a spring gathering.
Flower Cupcakes
My final recipe is one for cupcakes.
I love cupcakes. Some people think they are stupid or a waste of time. Why not just make a cake? I’ll tell you why.
Cakes take longer to decorate, bake and eat. You have to spend time cutting the cake and then thinking about how much you want, but with cupcakes, all you have to do is grab one.
Even though cupcakes are arguably the less popular option, I still love them. They are fun to decorate with friends and they’re hard to mess up.
This recipe is one I’ve been using for years because it uses oil as opposed to butter which I like more because I do not have to beat it. Beating butter is probably my least favorite thing when it comes to baking, it’s just too much effort. Using oil also allows for fewer mistakes to be made because if you don’t beat butter for long enough, then you will get dry cupcakes, but with oil, you don’t have to worry about it.
Additionally, this batter is extremely loose and liquidy, which I think produces more moist cupcakes. Basically, this cupcake batter is foolproof and very easy to make.
The decorations, however, might be a little more challenging and require more baking tools you may not have like the piping tip. It’s not required to make the cupcakes, but it creates a better shape for the center of the flower.
A substitution could just be a piping bag without the tip. In my opinion, you should get piping bags and not use a sandwich or plastic bag because the square shape causes harm to the piping experience.
Don’t feel limited to making flowers, either. You could decorate them any way you like, but definitely use this frosting recipe because of how light and fluffy it is.
These cupcakes would be fun for any easter party, spring get-together or just for a weekend activity and I definitely recommend you make them.
Cake
2 ½ cups flour
2 cups sugar
3 tsp baking powder
1 tsp salt
1 cup milk
½ cup vegetable oil
1 tbsp vanilla extract
2 eggs
1 cup water
Whipped Cream Cheese Frosting
1 cup full-fat cream cheese (cold)
1 cup powdered sugar
1 tsp vanilla extract
2 ½ cups whipping cream
Instructions
- Preheat oven to 350 F and line a cupcake pan with cupcake liners
- Add the flour, sugar, salt and baking powder in a large bowl and mix together
- Next, add the milk, oil, vanilla extract and eggs to a medium-sized bowl
- Combine the two mixtures and stir till well combined with no clumps of flour
- Add the water to the flour and milk mixture and stir lightly until combined. The mixture will be very runny.
- Fill the cupcake liners about half full and bake for 15-18 minutes or wait till a toothpick comes out clean
- Once baked, take the cupcakes out of the pan and let them cool completely on a cooling rack.
Frosting Instructions
- Chill your mixing bowl and whisk attachments in the freezer for 30 minutes. You can use a stand mixer or hand-held electric mixer.
- Take 1 cup of cold cream cheese and beat on low speed until smooth.
- Gradually add 1 cup of powdered sugar and beat on low then slowly increase the speed to medium when the powdered sugar is incorporated. Then mix for about 1 minute, be sure not to over-mix and scrape the bowl as needed.
- Add in 1 tsp of vanilla extract then turn to medium and very slowly pour the cold whipping cream in.
- Be mindful of the mixture not letting it be over-mixed. Watch as the heavy cream is fully mixed in and starts to thicken. If frosting is over-mixed, it will become soupy and not pipeable.
- When the frosting starts to take shape, turn off the mixer and test the thickness of it by taking a whisk attachment and dunking it in the frosting. Then flip the attachment upside down, if it forms a nice peak and keeps its shape, then it’s done. If not, keep mixing in 30-second intervals till stiff.
Decorating instructions
- Take your frosting and take ¼ out and dye it one color and then take the rest of the frosting and dye it another color.
- Put the smaller amount of frosting in a piping bag or plastic bag with a big round circle piping tip (I am using the Wilton 1A). Leave the rest of the frosting in the bowl.
- Next, take an offset spatula and dip it into the frosting just enough to put a dollop on the end of the spatula. Take the spatula and swipe down the cupcake making a pedal.
- Repeat that step a few more times until you have a ring of petals around the cupcake.
- Take the piping bag and make a dollop in the middle to finish off your cupcake
- You can add sprinkles, candles or any other decoration when you finish piping.